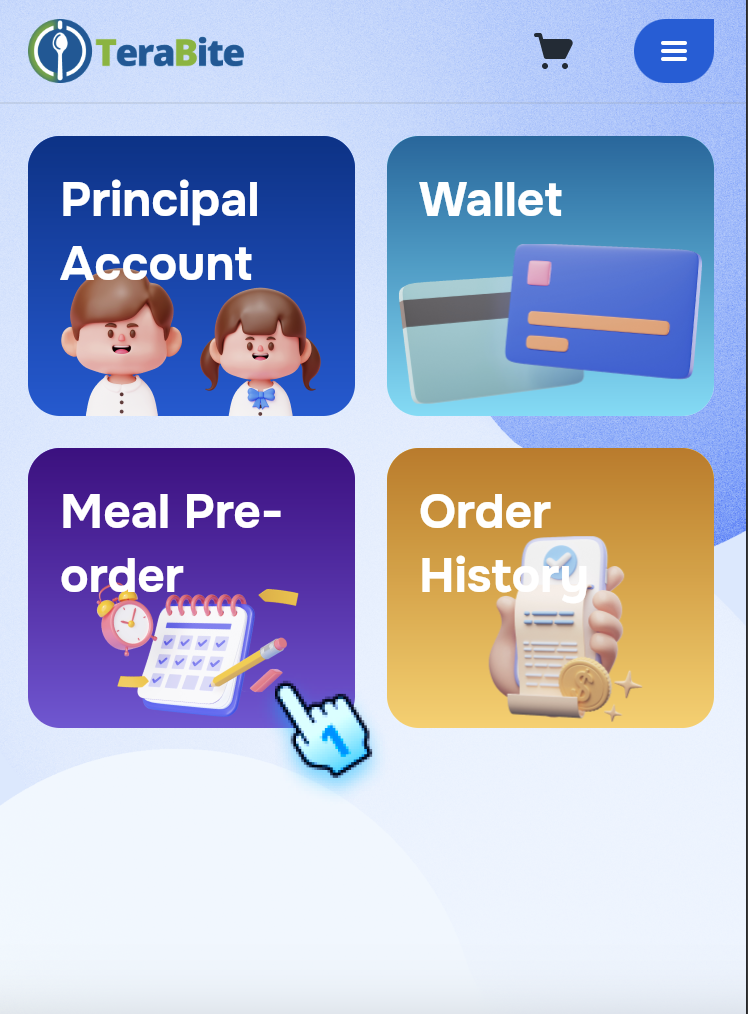
Meal Pre-Order Management
Description
This section provides instructions for placing pre-orders, including selecting accounts, filtering items, and completing the order process.
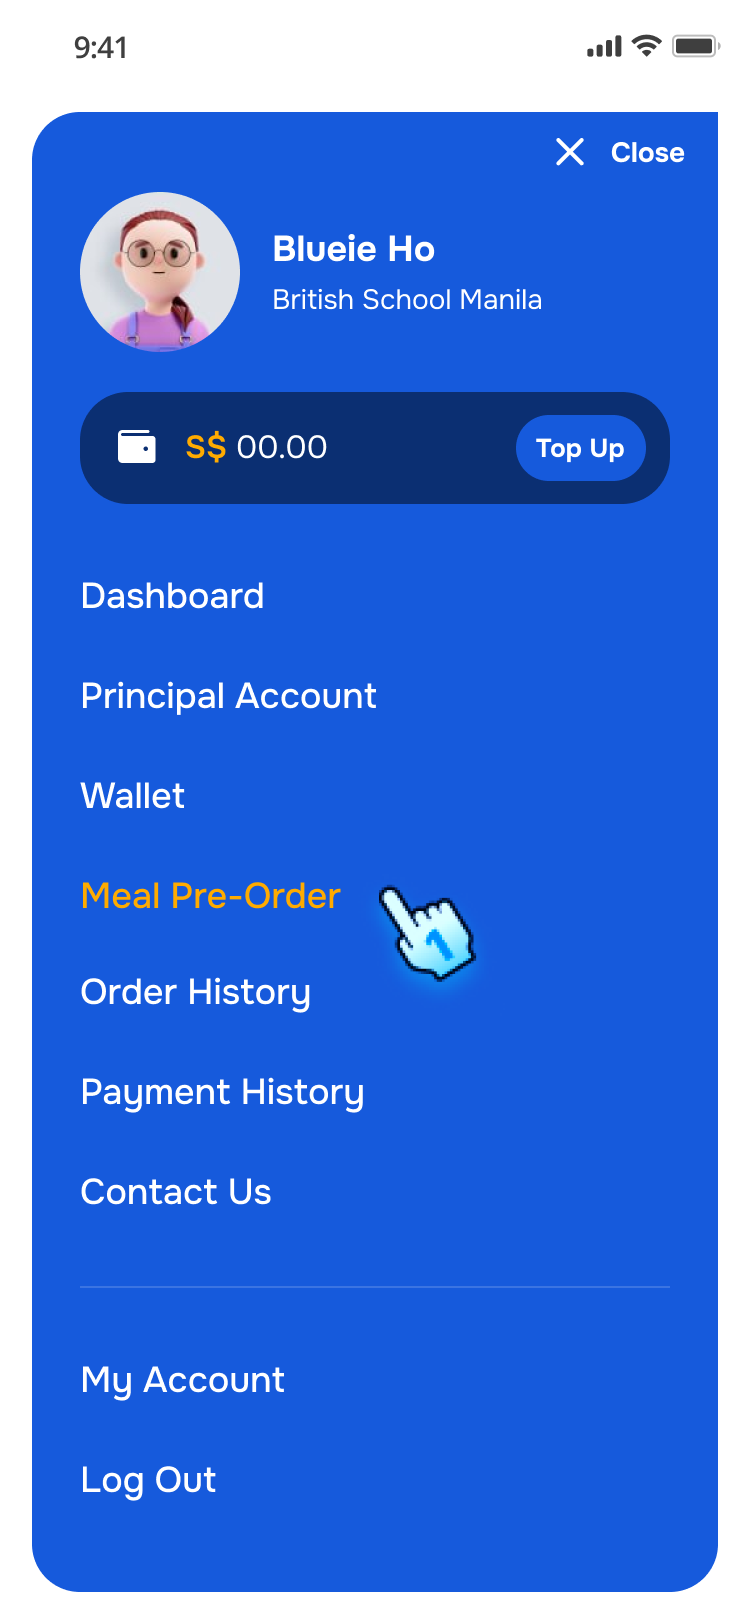
Navigate to Meal Pre-Order
- Access Meal Pre-Order Section
- Log in to the C-Portal.
- Navigate to the Meal Pre-Order section.
- Tap on Meal Pre-order in Dashboard or Menu
- The Meal Pre-Order page will be displayed.
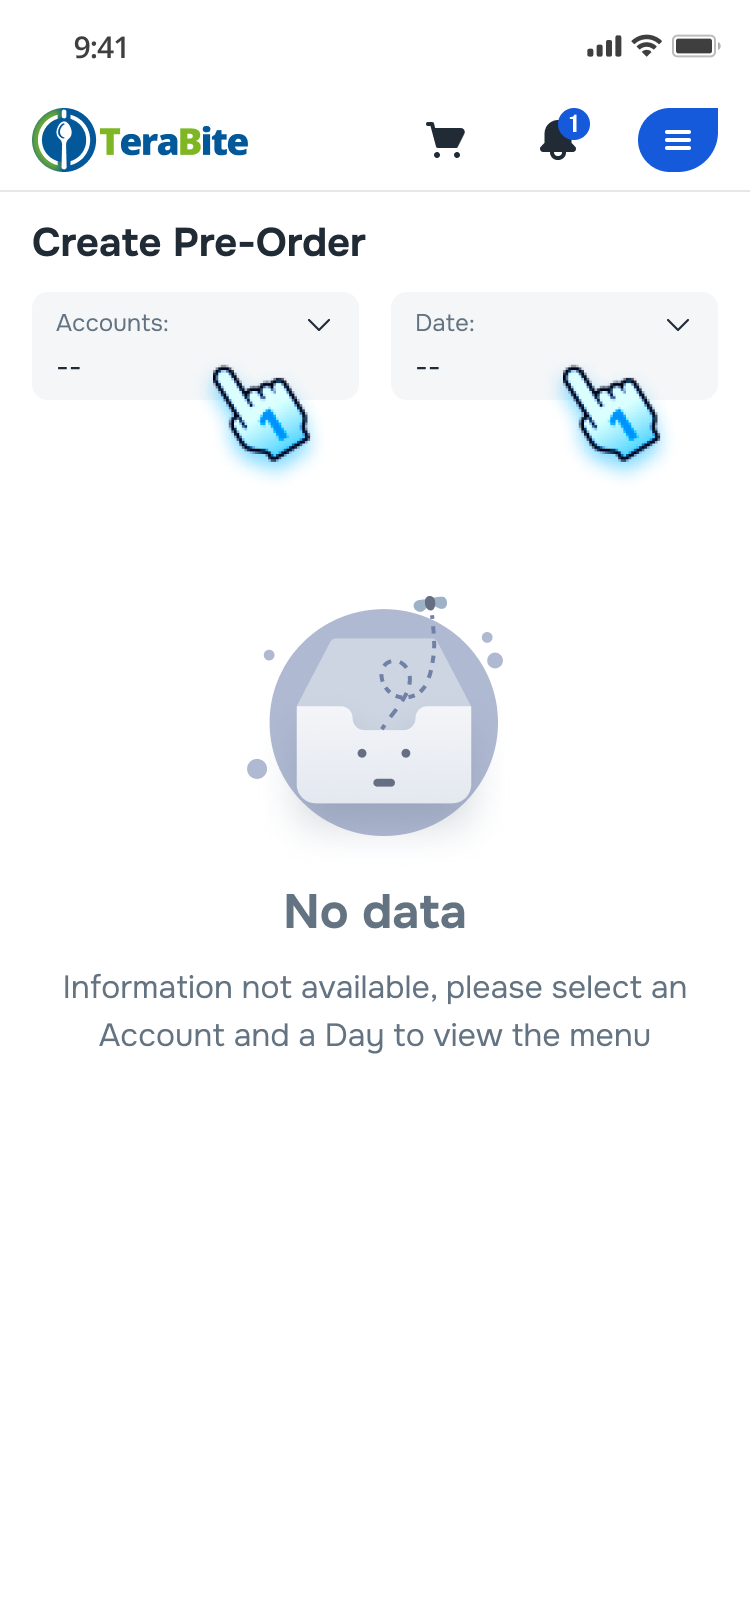
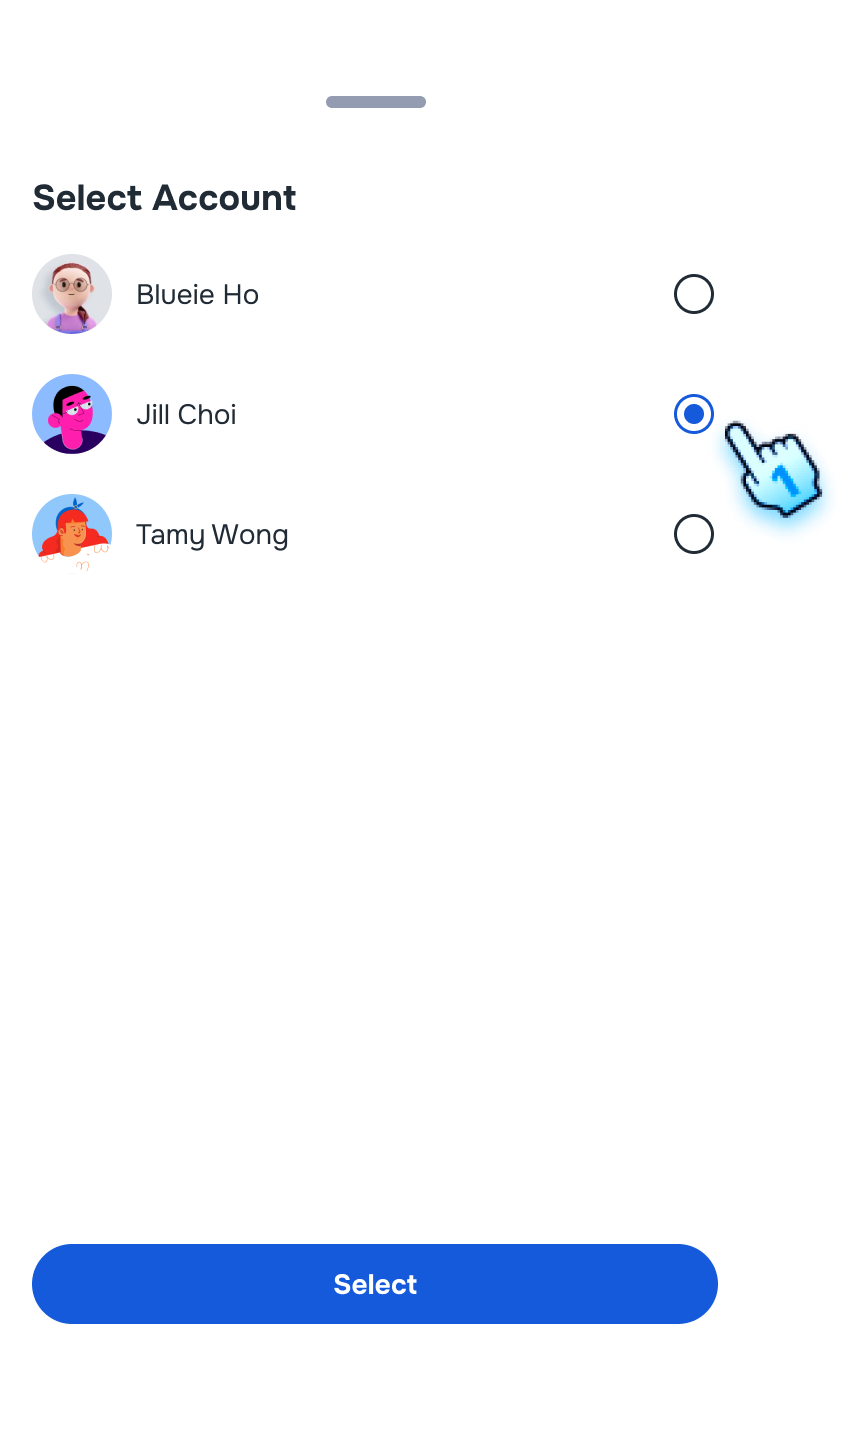
- Select Account/Sub-Account for Pre-Order
- Tap on Account/Sub-Account
- Account/ Sub-Account list displays
- Choose an account or sub-account from the list.
- Tap on the to Account card.
- Tap on "Select" button
- The selected account/sub-account will be displayed on the Accounts card.
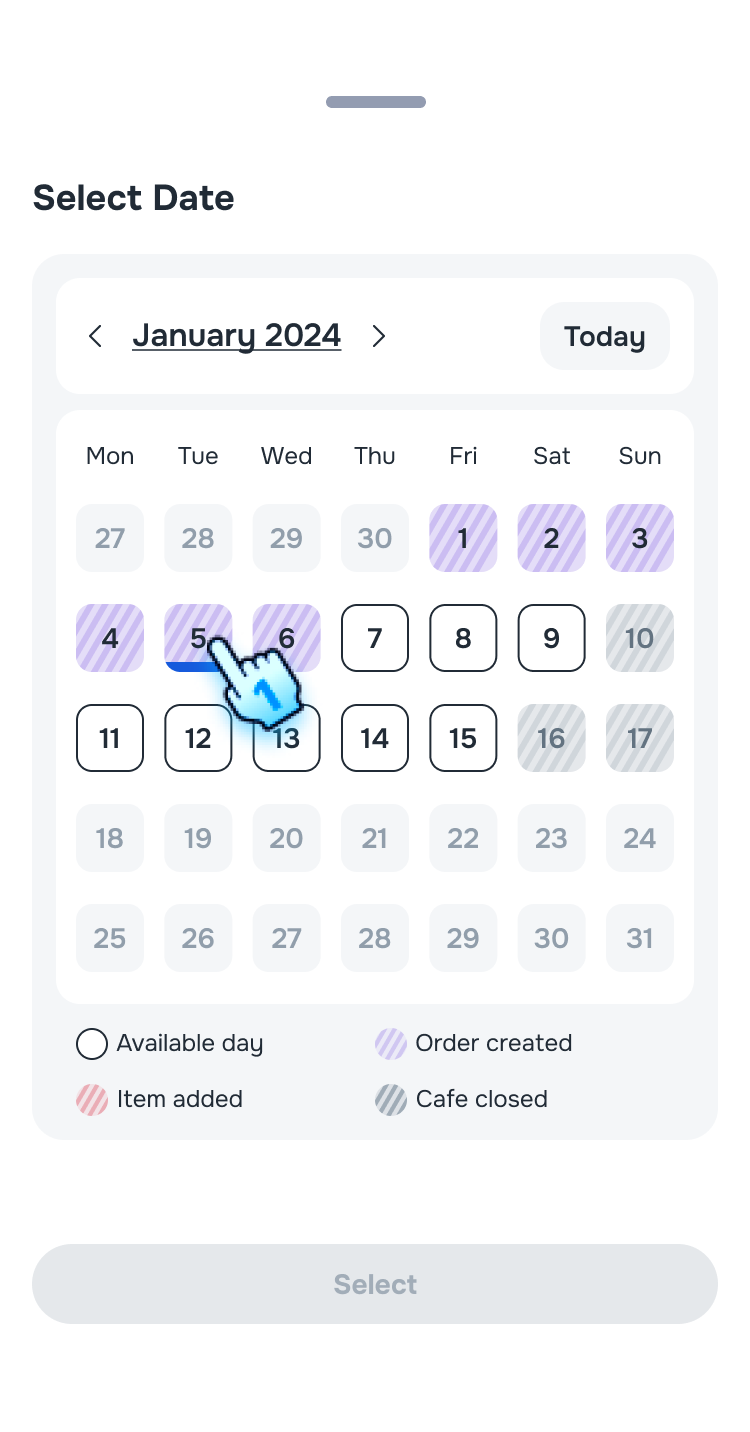
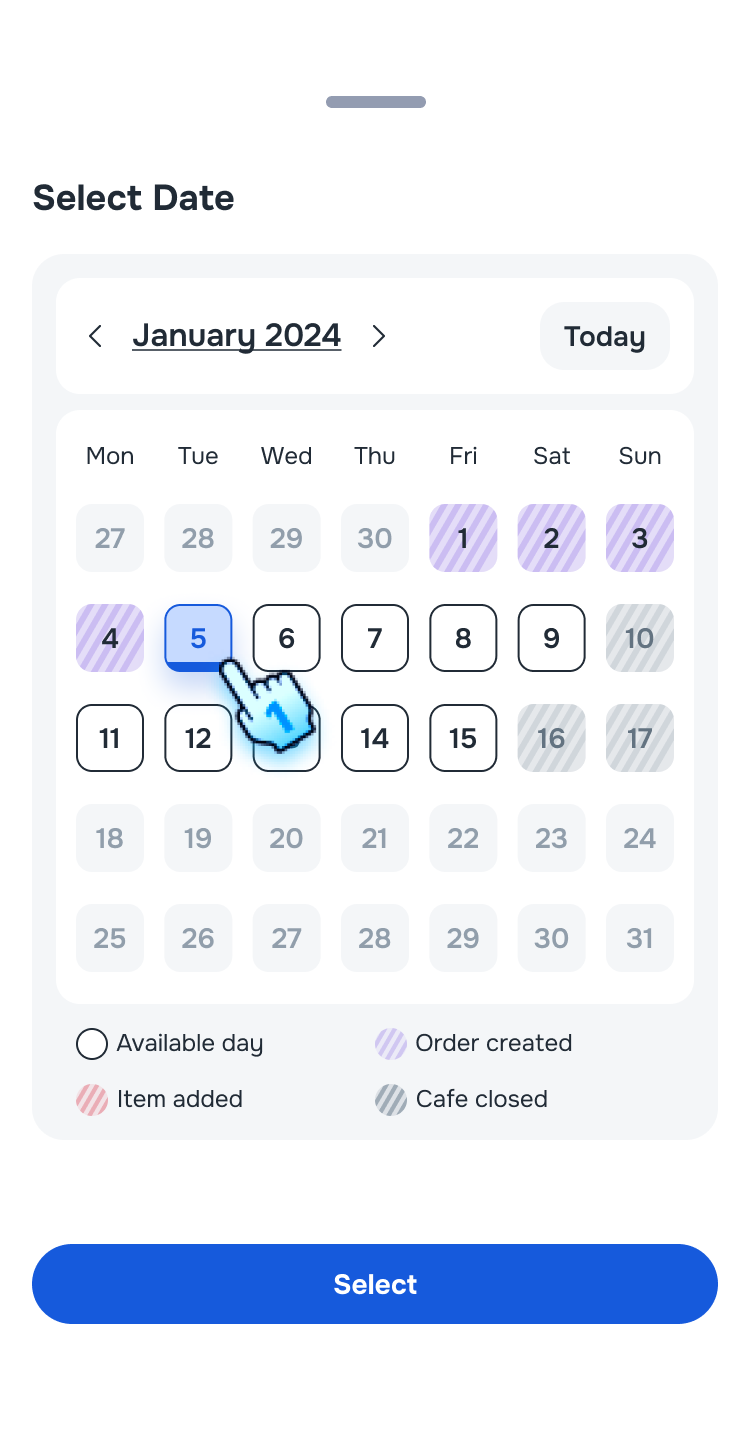
- Select Day for Pre-Order
- Tap on Day card
- The Calendar will display including:
- White: Empty order
- Purple dash: Pre-Orders created
- Red dash: Items added
- Underscored: Today
- Choose a specific day.
- Select a specific day from the calendar.
- Tap on "Select" button
- The selected date will be displayed in the Days card
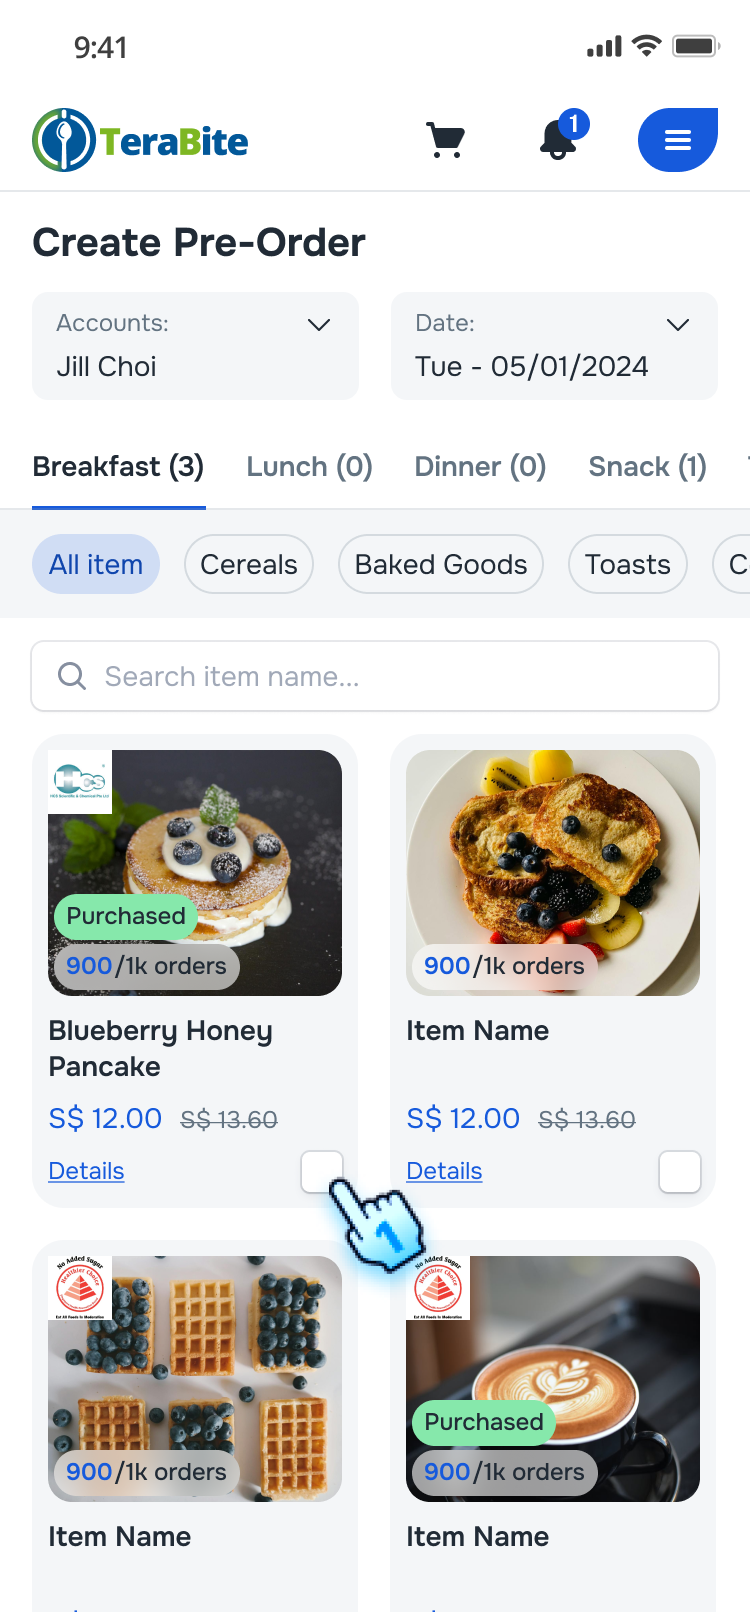
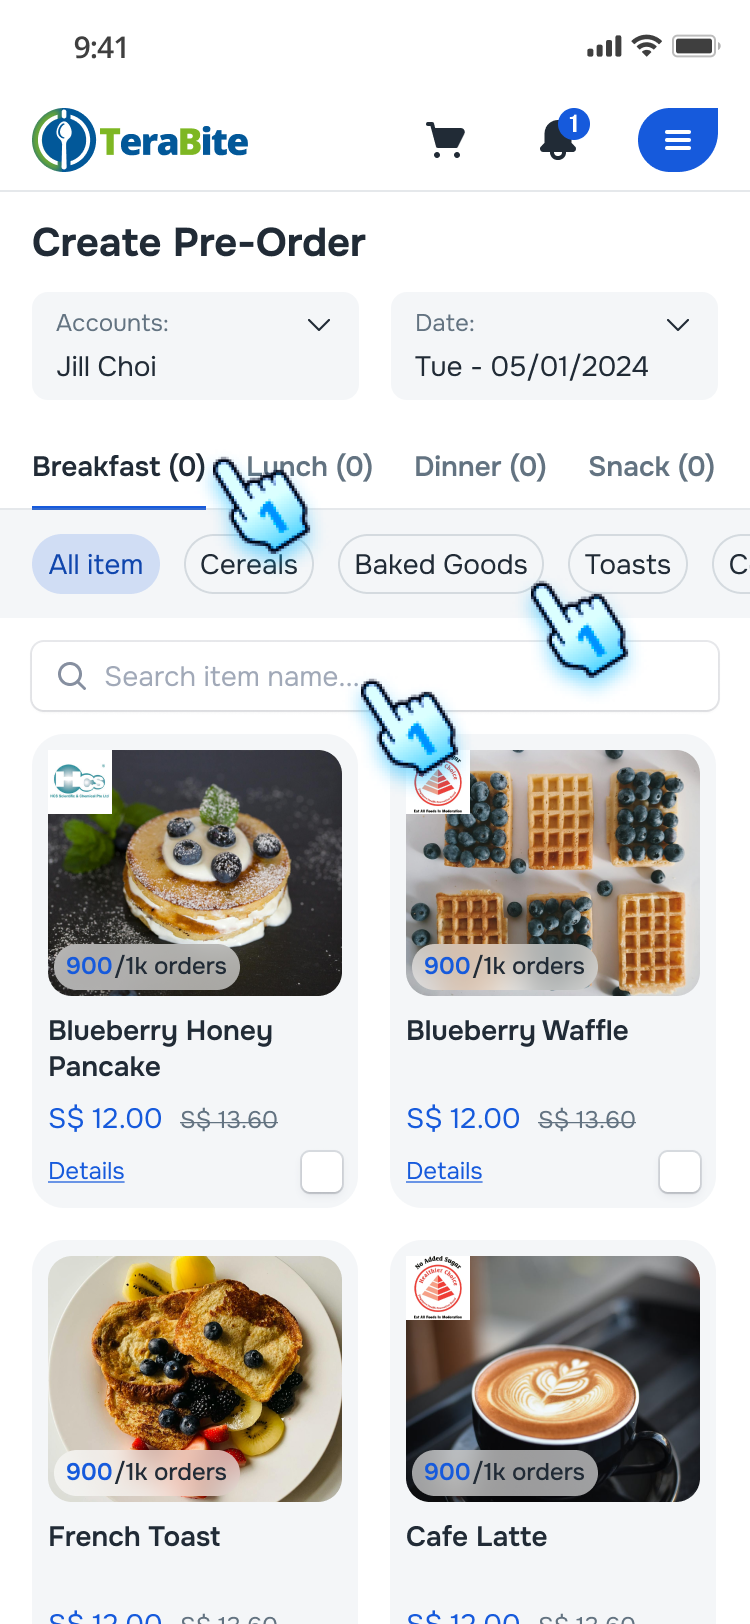
Filter Items and View item detail
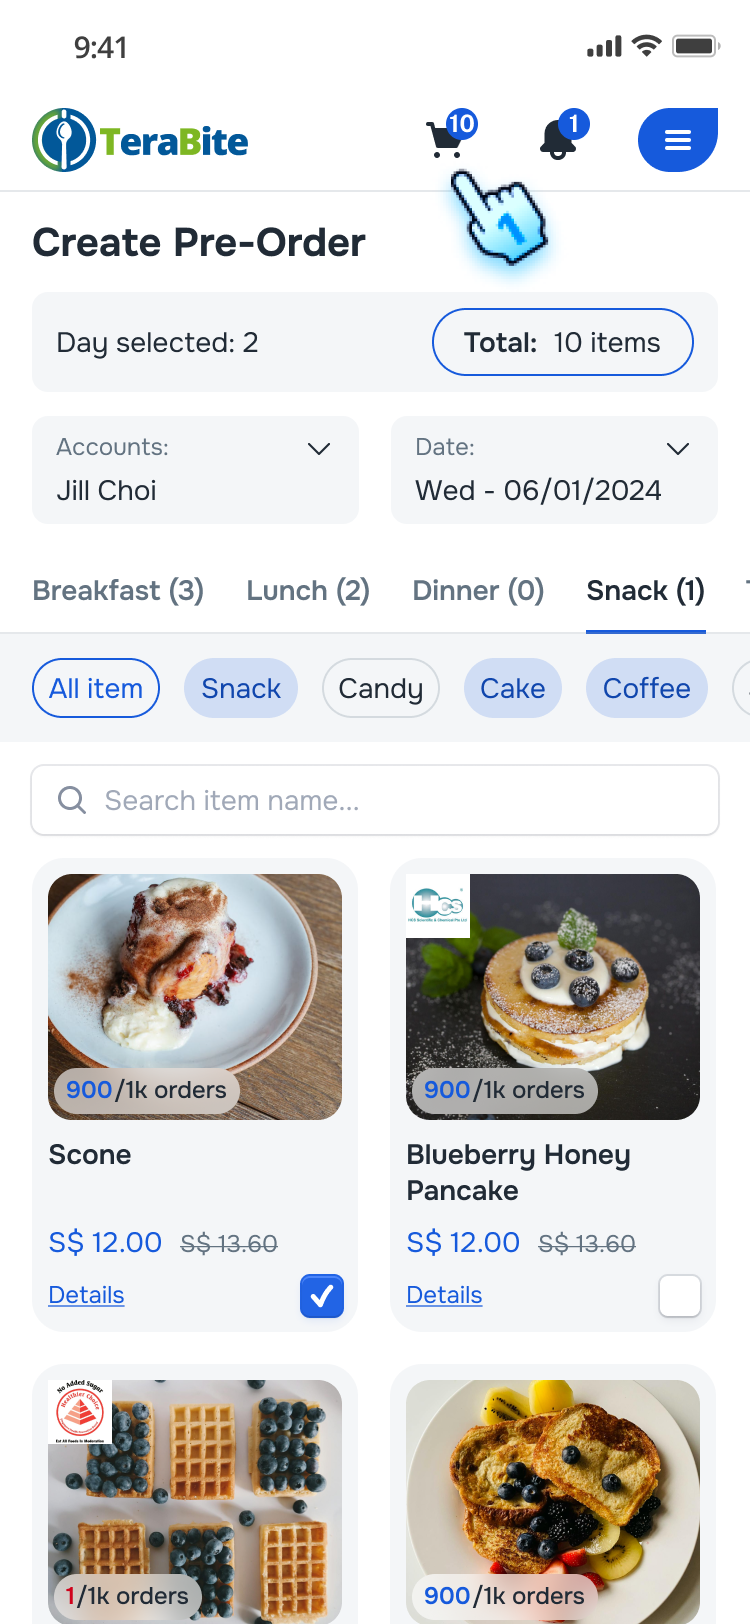
- Filter by Meal Time
- On the pre-order items selection page, select a meal time (e.g., breakfast, lunch).
- The items will be filtered based on the selected meal time.
- Filter by Category
- Select a category
- The items will be filtered based on the selected category.
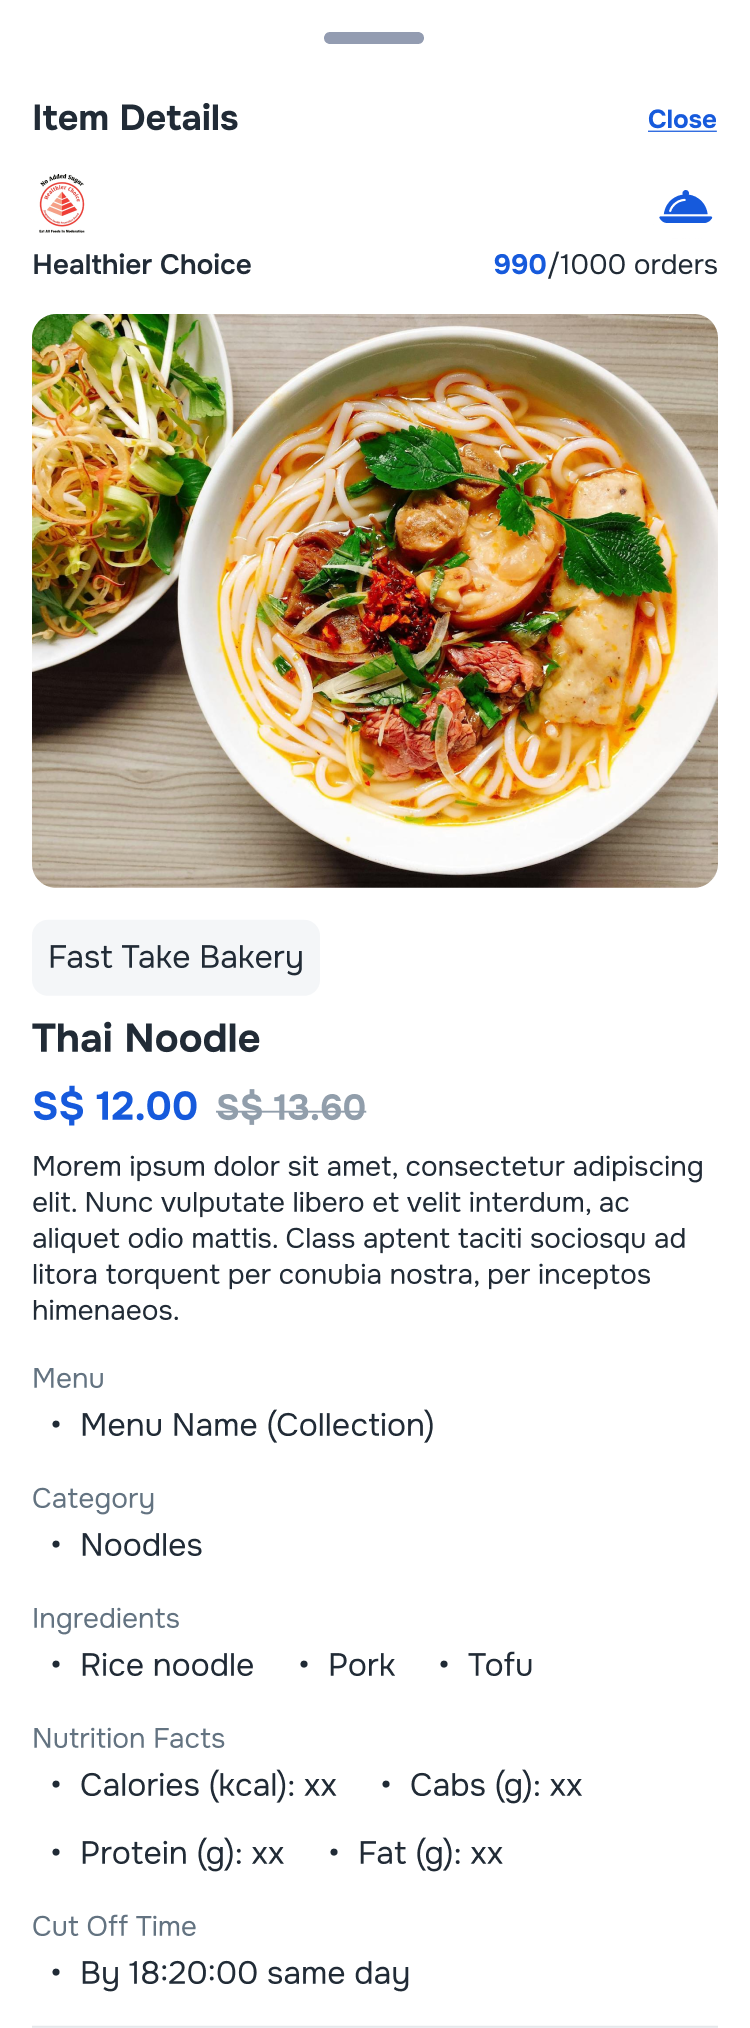
- View item detail
- Tap on "Details" button at each item
- Item detail will be displayed
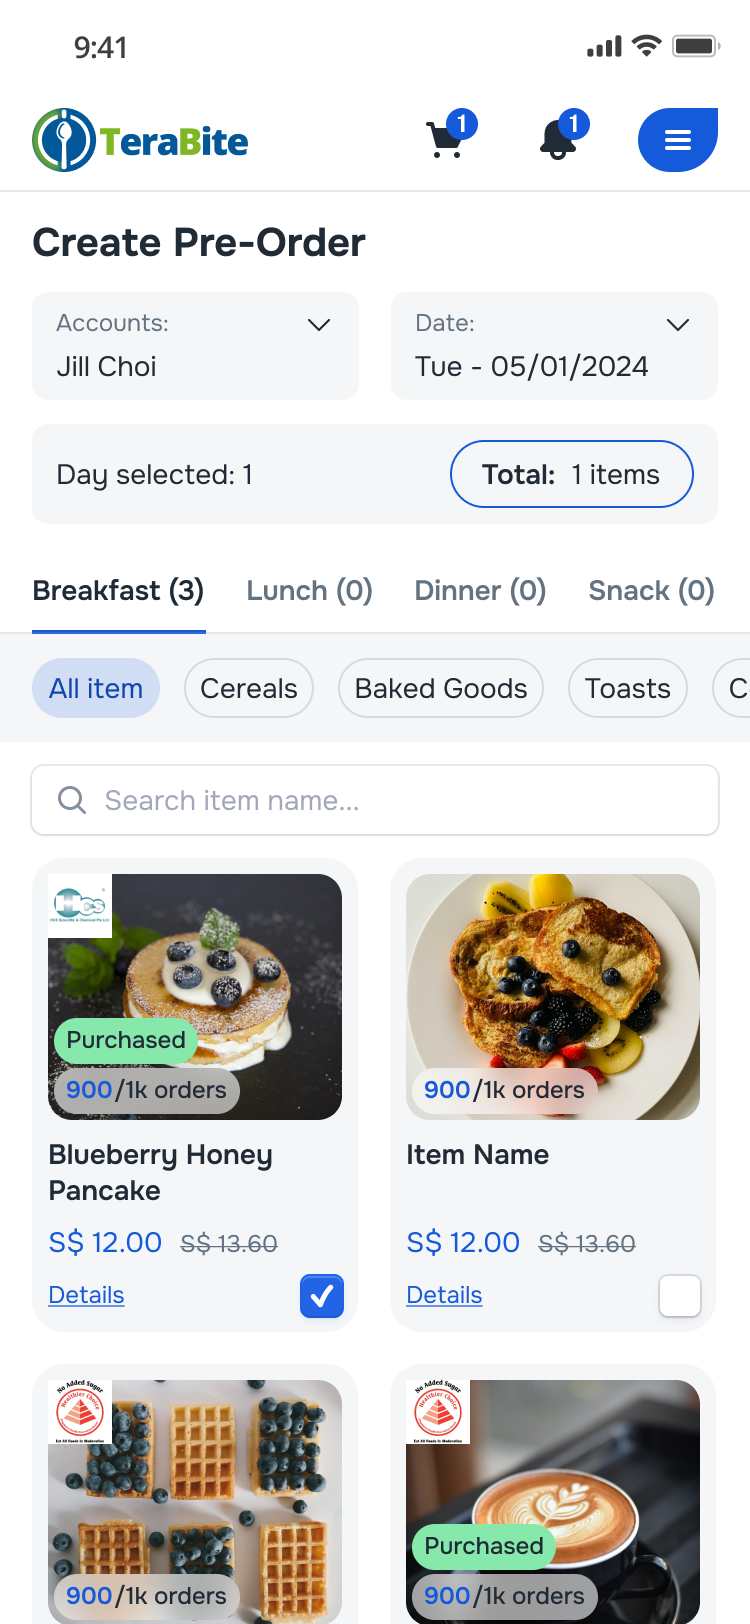
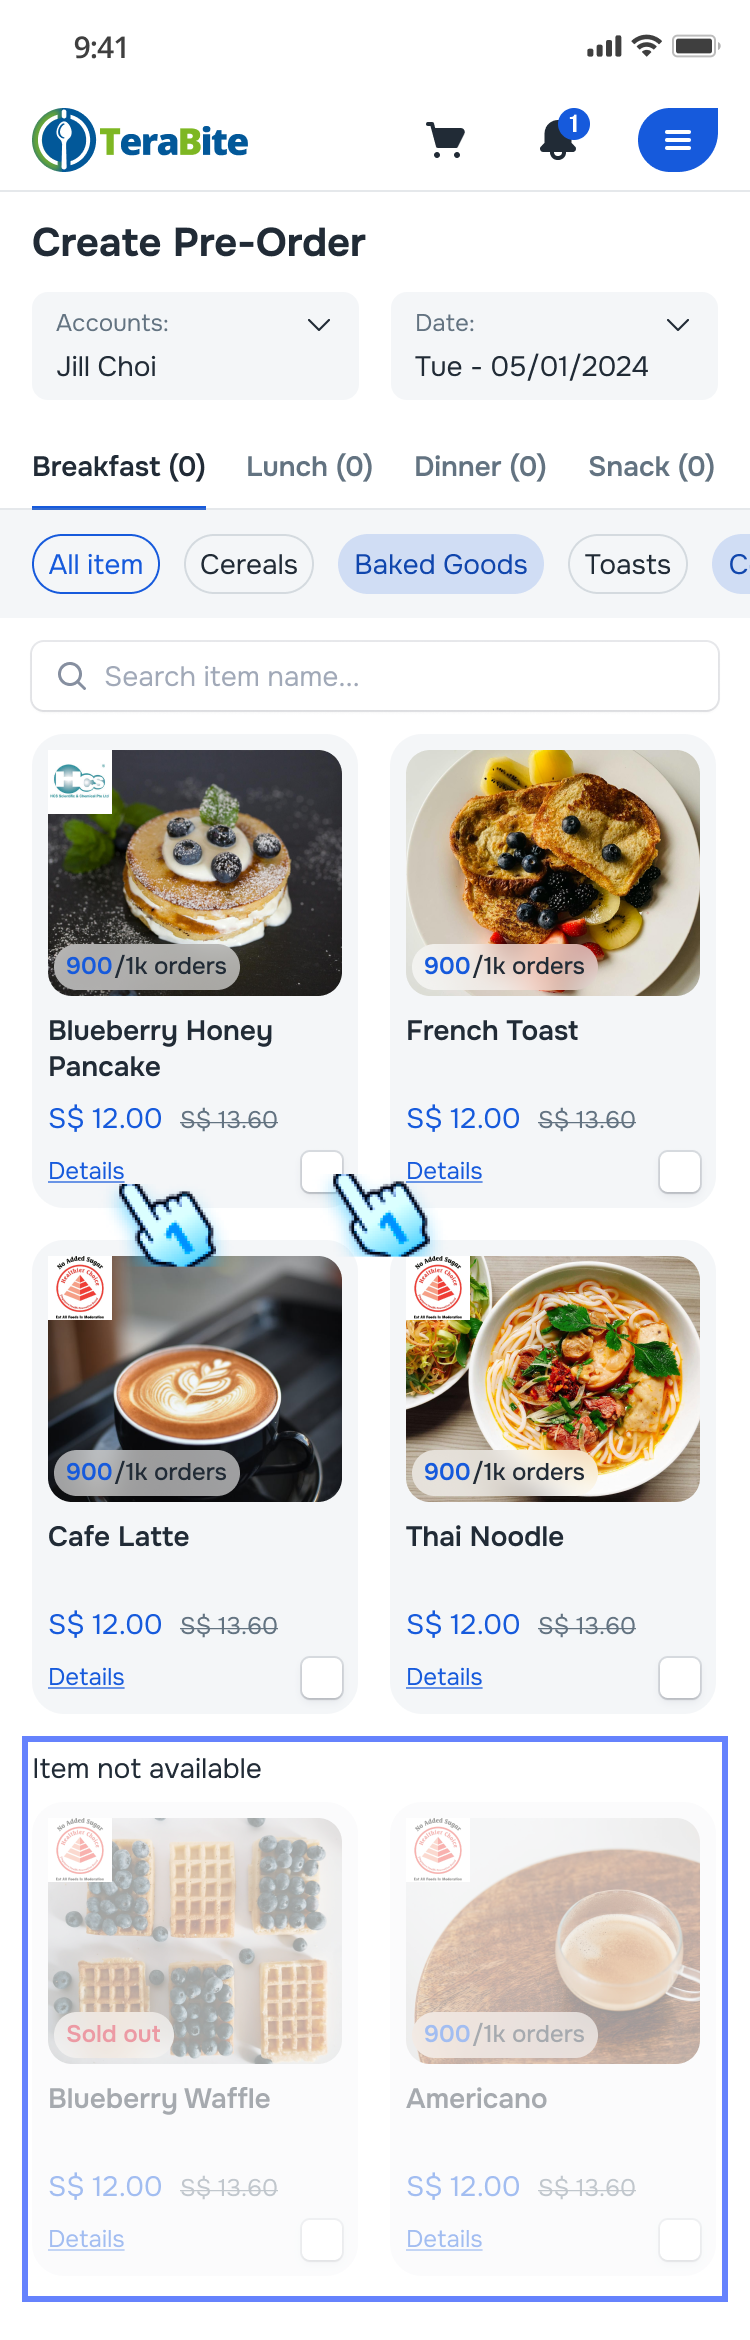
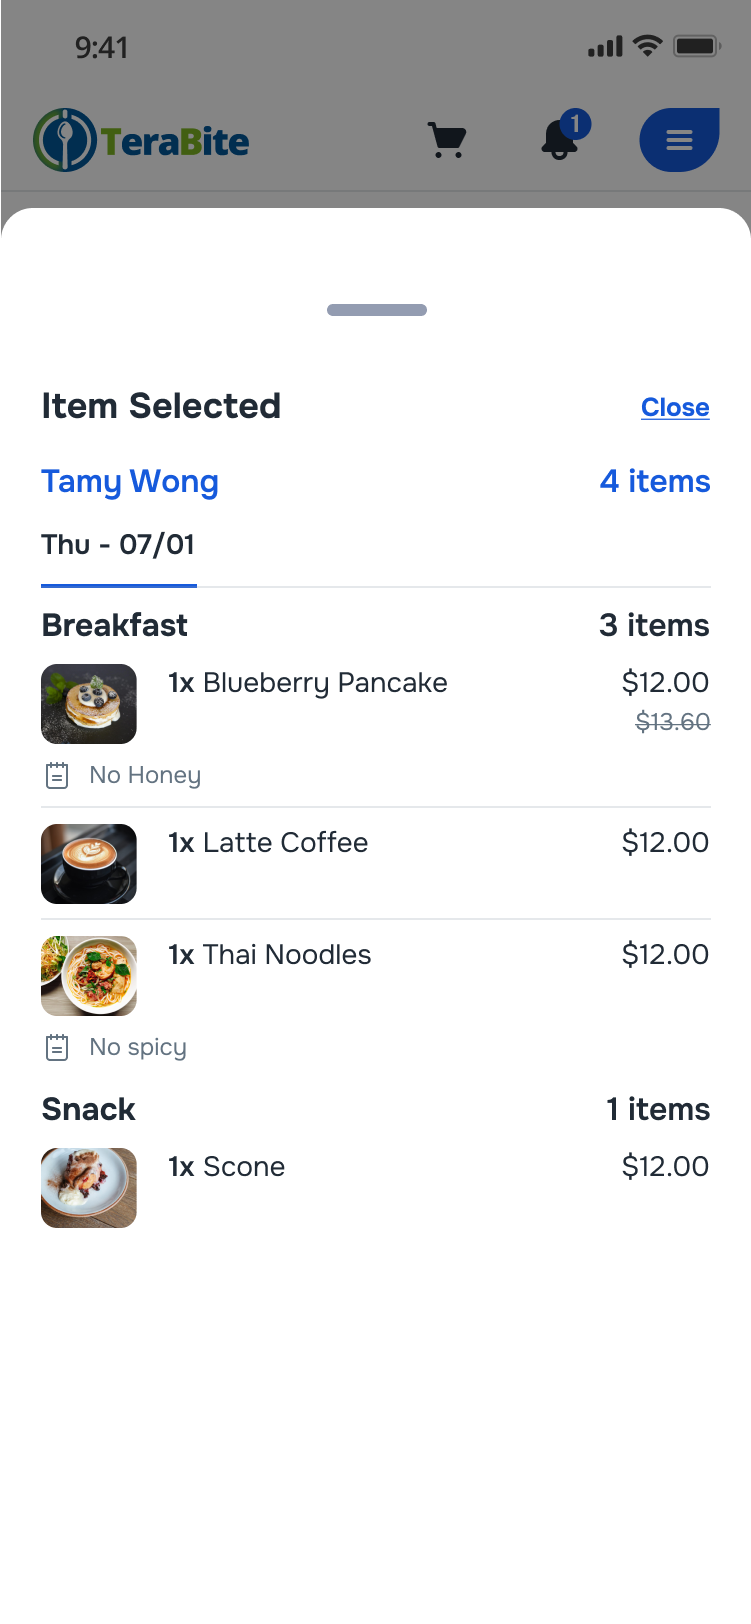
Select Items and Adjust Quantity
- Select Items
- Tap the checkbox next to each item to add it to the pre-order.
- The selected items will be added to the cart. *Note: The unavailable items will be greyed out
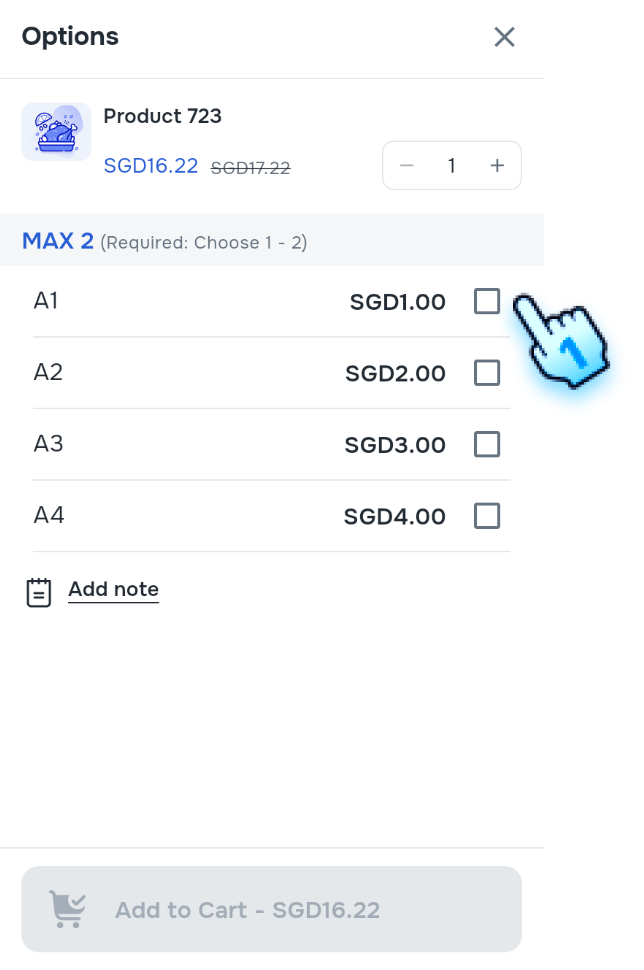
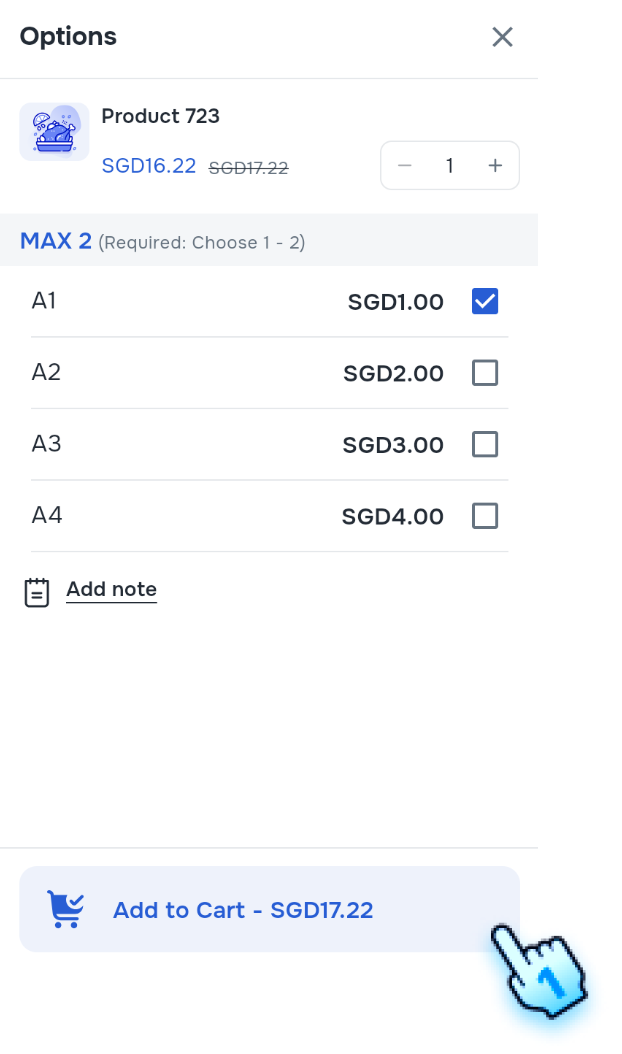
- Select Item with Options
- Tap the checkbox on an item with options to open the Options popup.
- Select the desired options and add the item to the cart.
- The selected items will be added to the cart.
- Open Options Popup from Cart
- Access the Options popup from the cart to update item options.
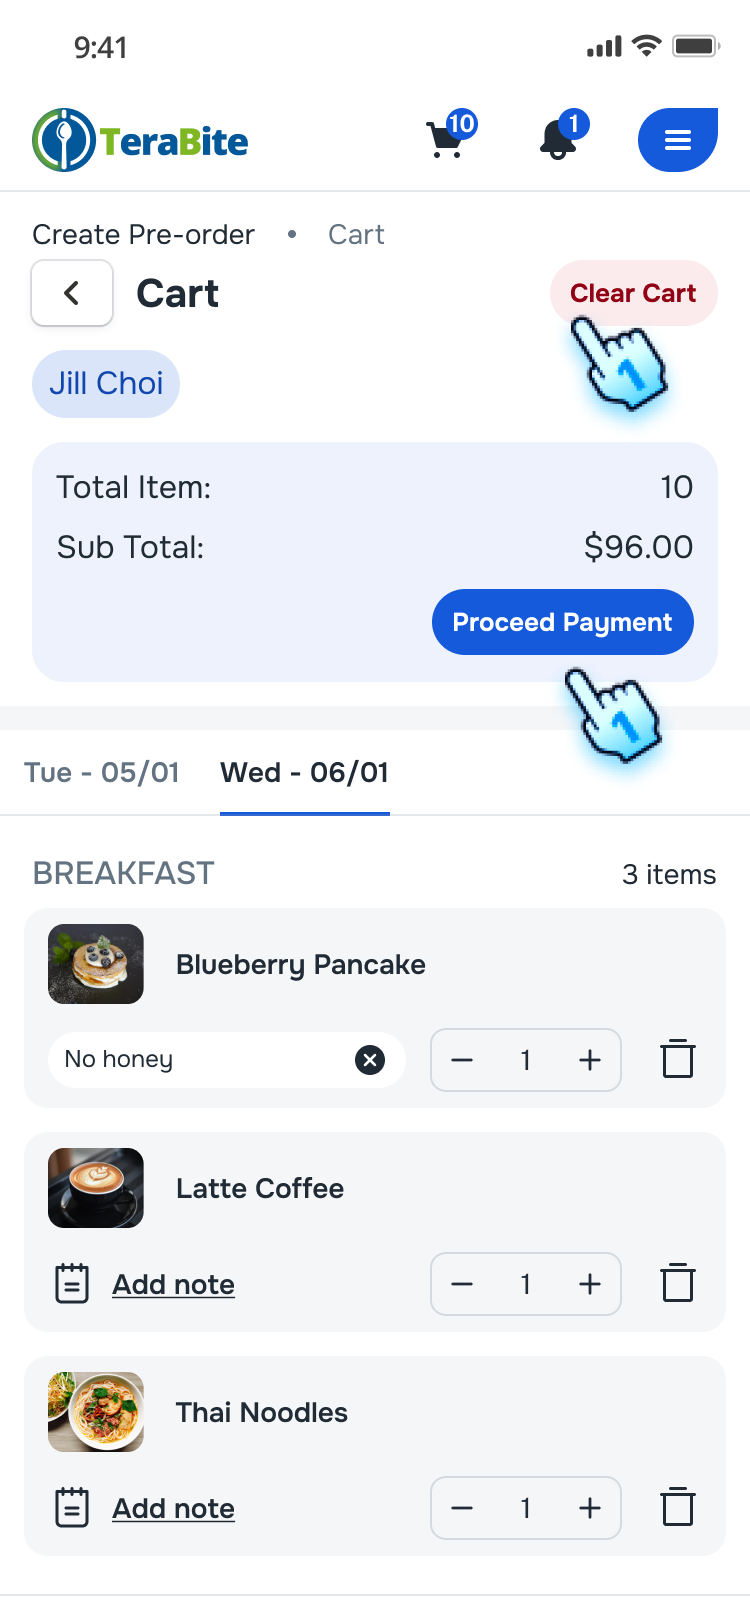
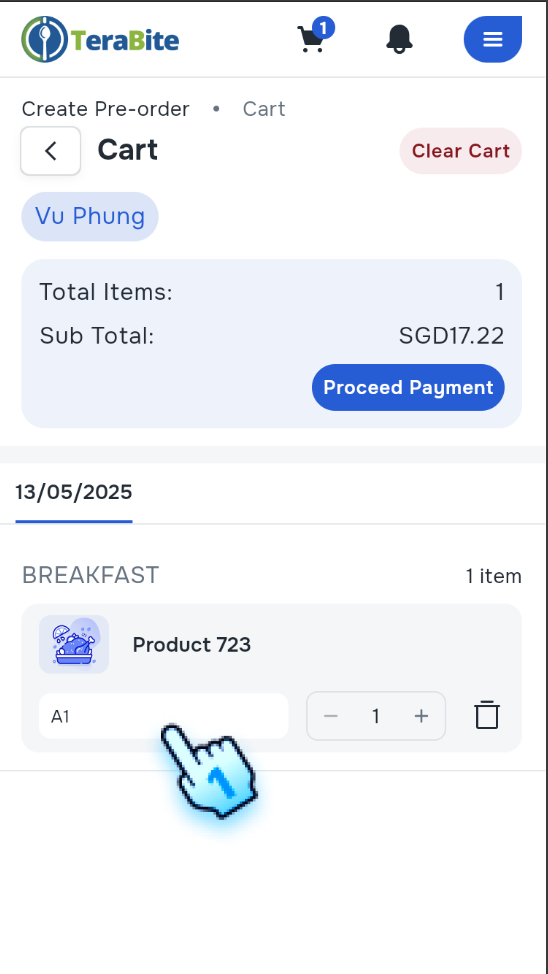
- Adjust Quantity
- Tap the cart icon to view the order summary.
- Modify the quantity of each item as needed.
- The total order amount will be updated accordingly.
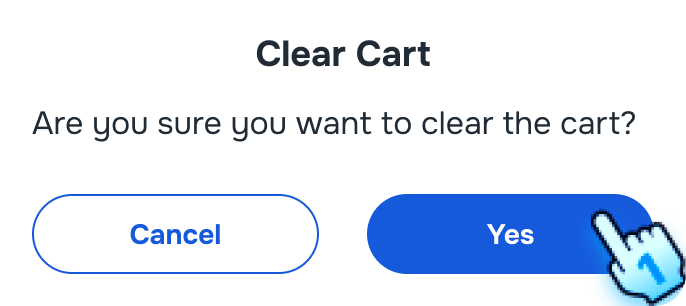
- Clear cart
- Tap Clear Cart button.
- Confirm the pop-up dialog to clear all items in the cart.
Add Notes and Complete Order
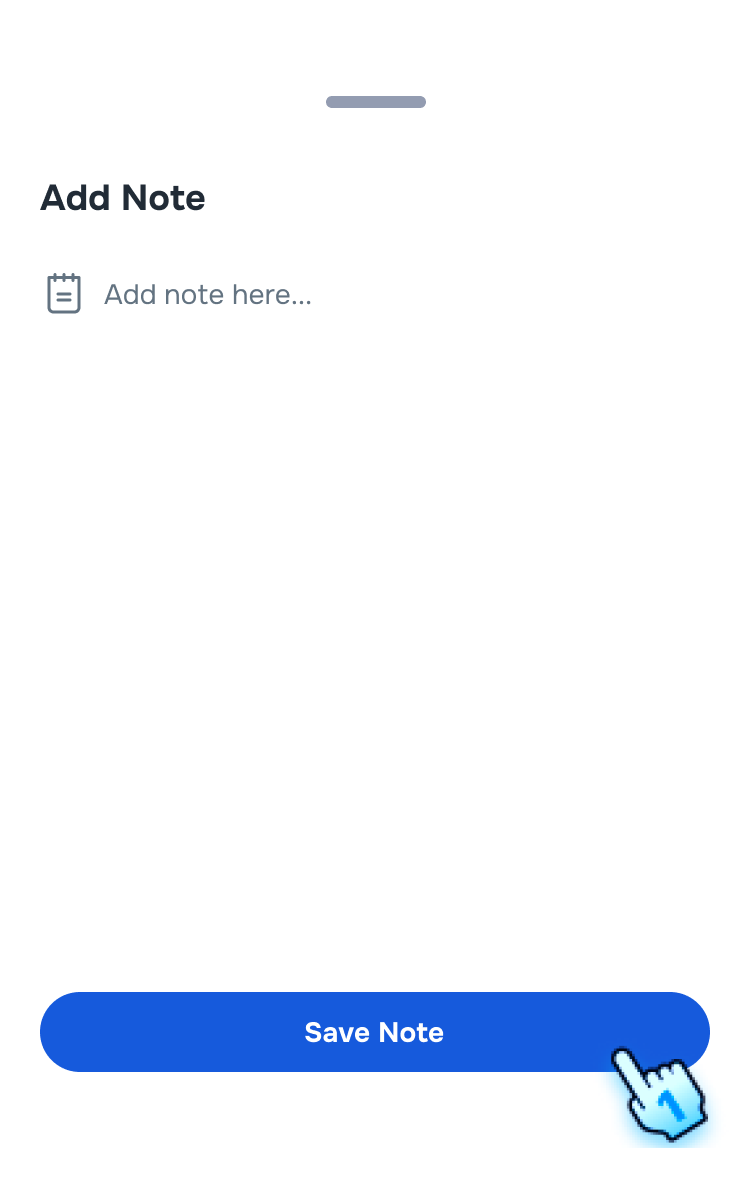
- Add Notes
- Click the "Add Note" button.
- Enter any special instructions or notes.
- Click "Save Note" to attach the note to the each items.
- Enter any special notes.
- Click "Save Note" to attach the note to the order.
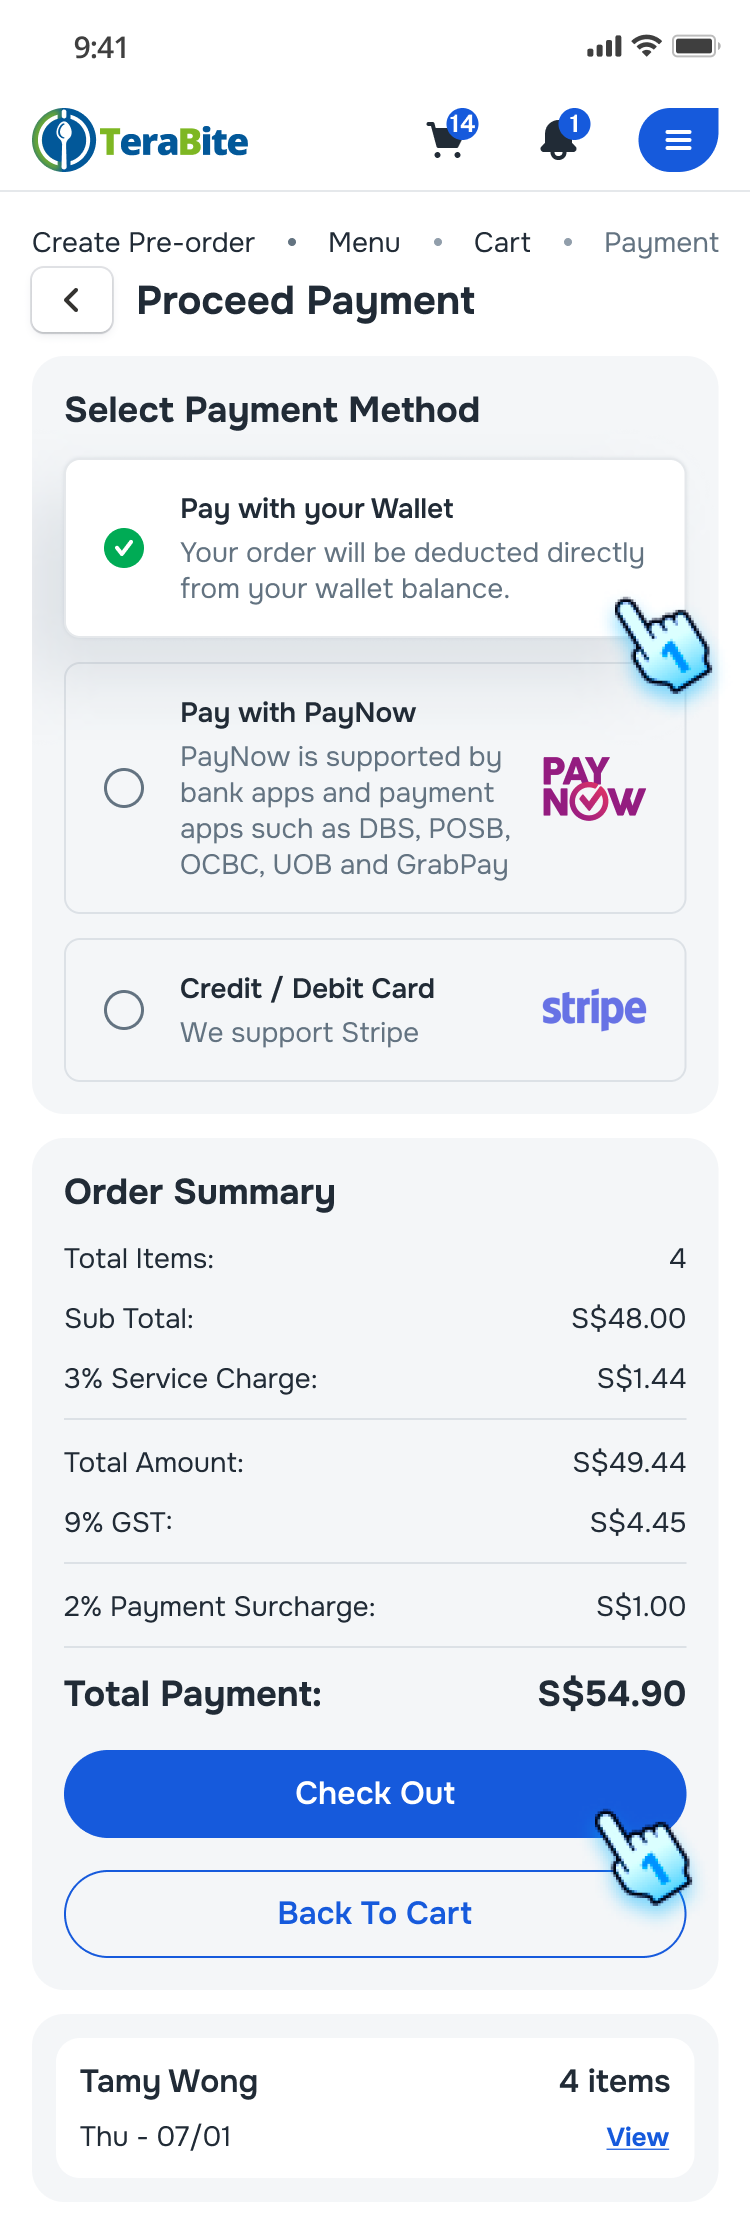
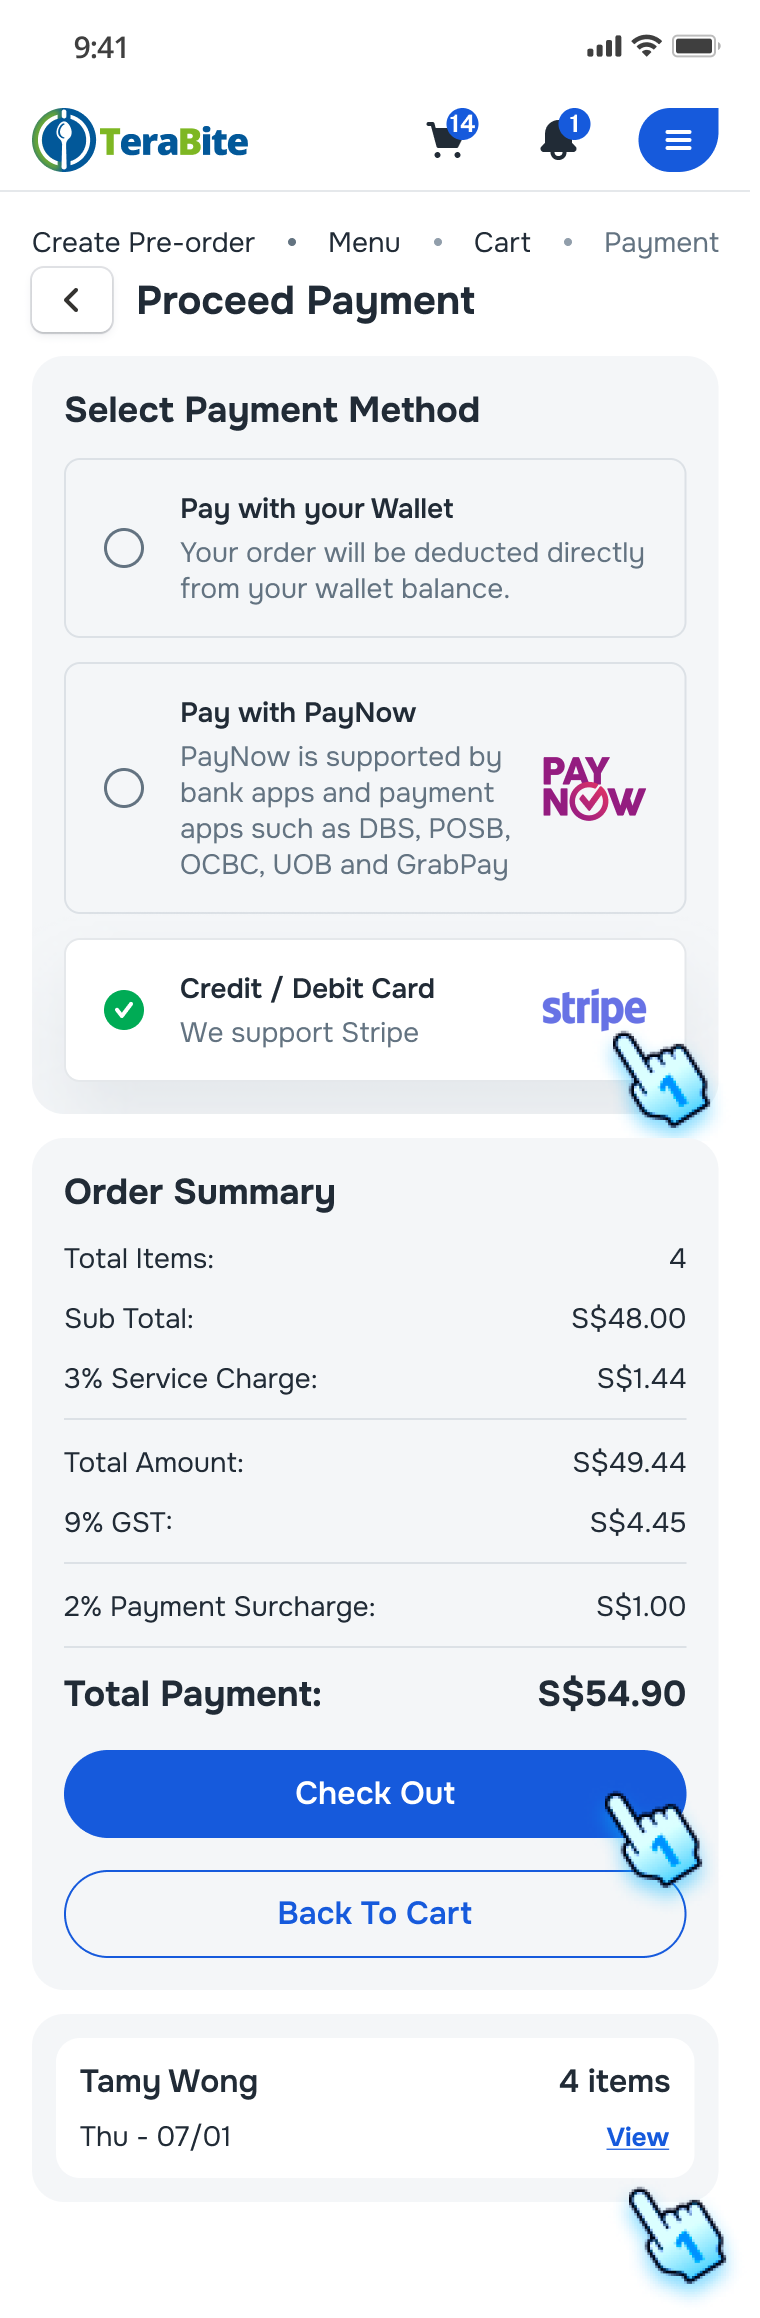
- Select Payment Method
- After adjusting the order, click the "Process Payment" button.
- Choose a payment method from the available options (e.g., credit card, e-wallet).
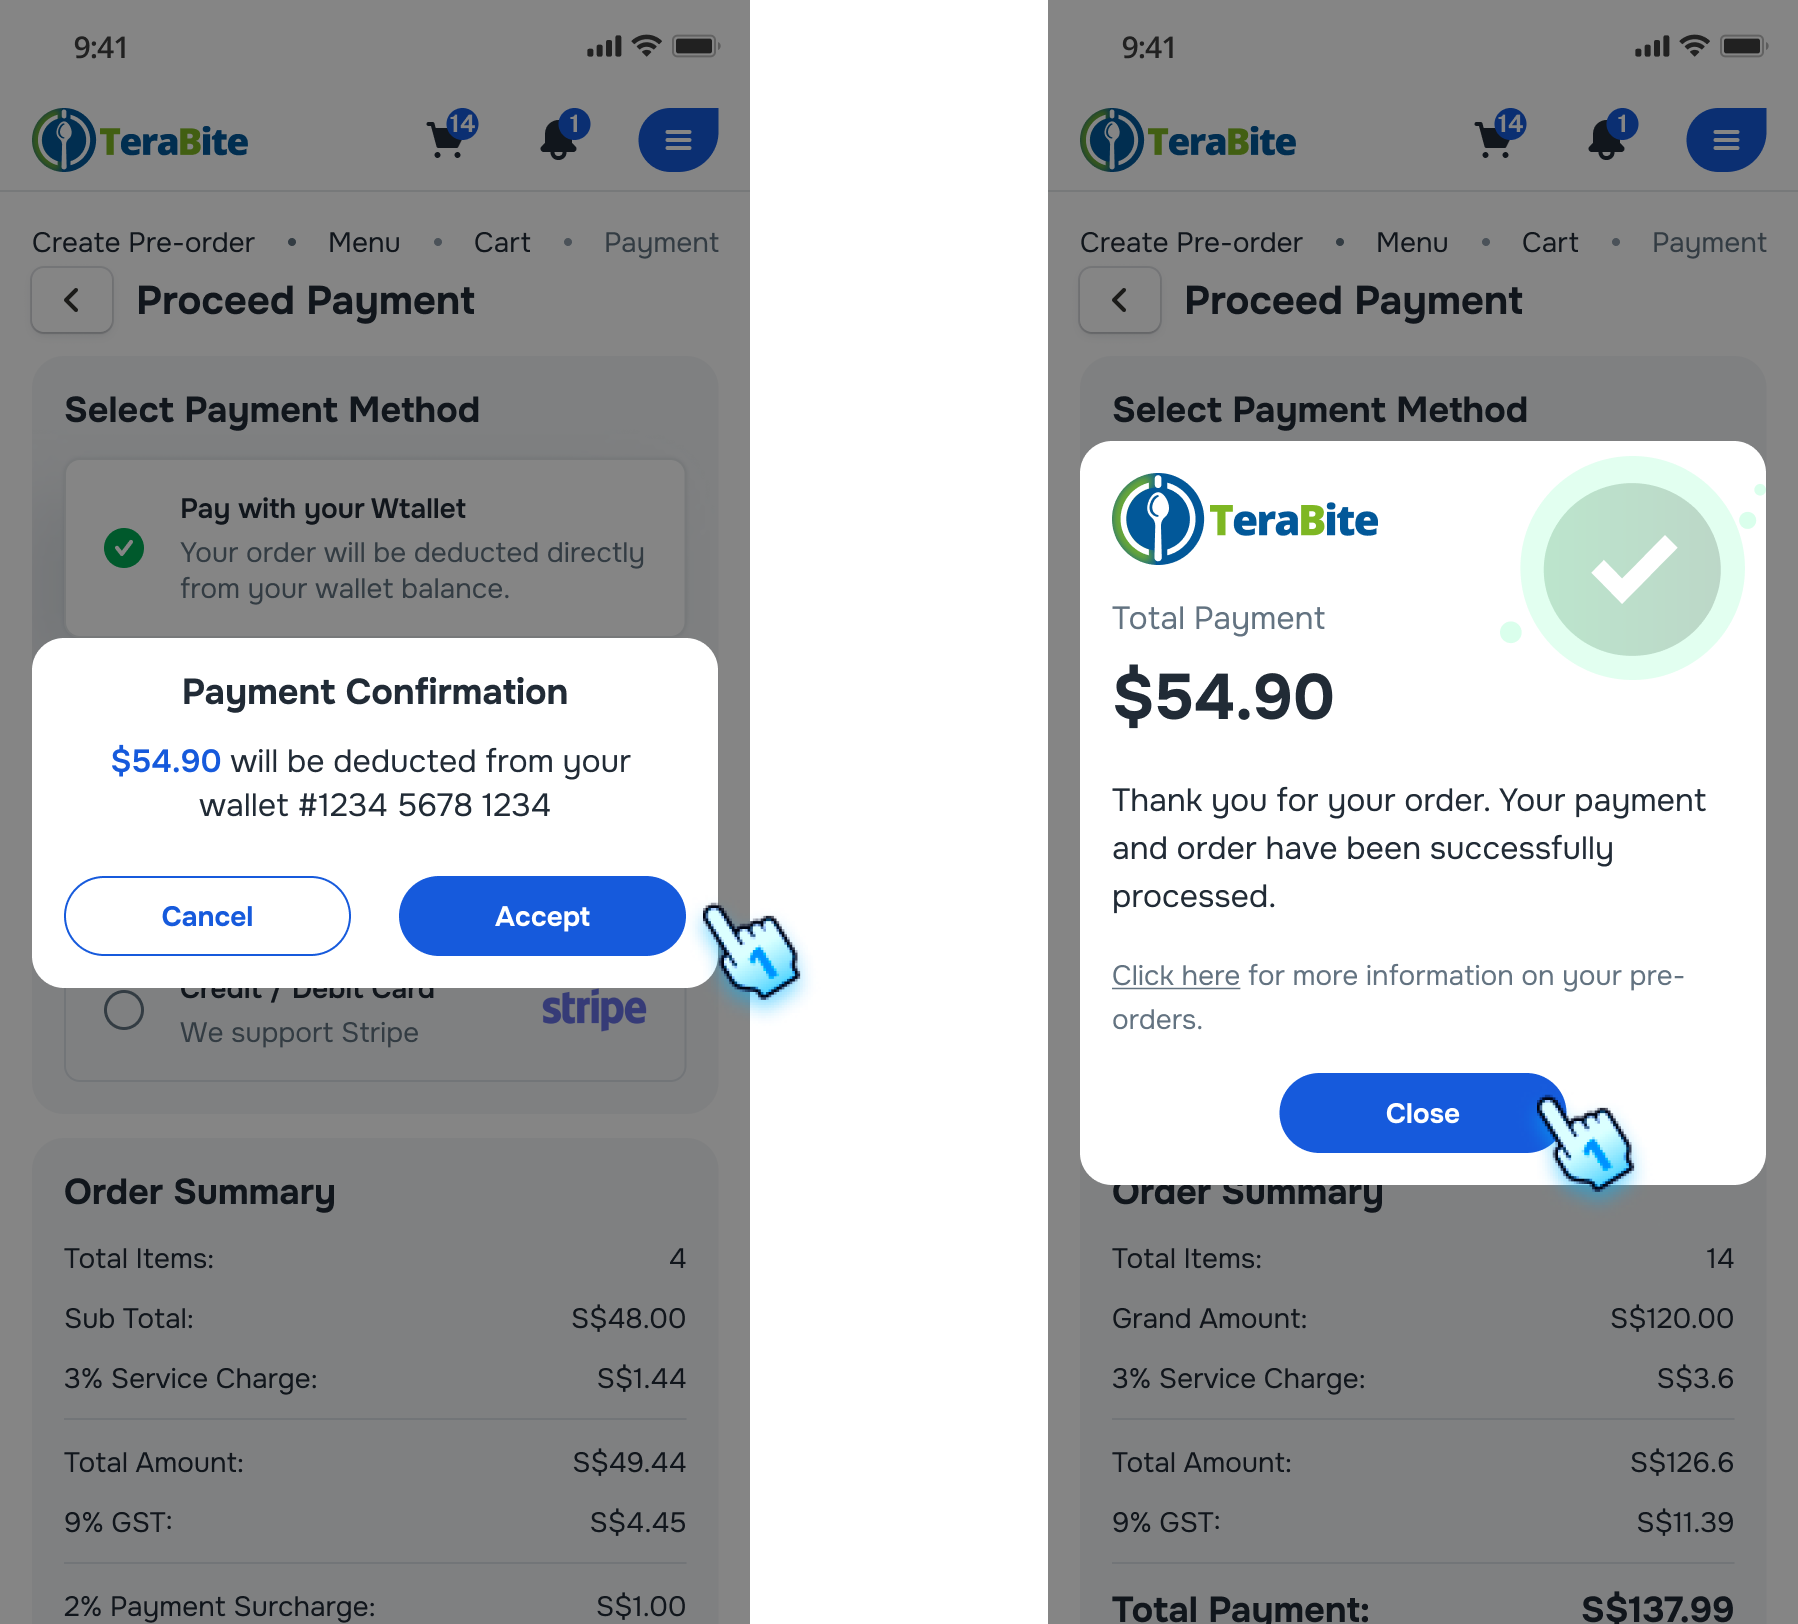
- Check Out
- Click the "Check Out" button.
- Follow checkout process:
- Pay with Wallet: Tap on "Accept" button on the confirmation dialog
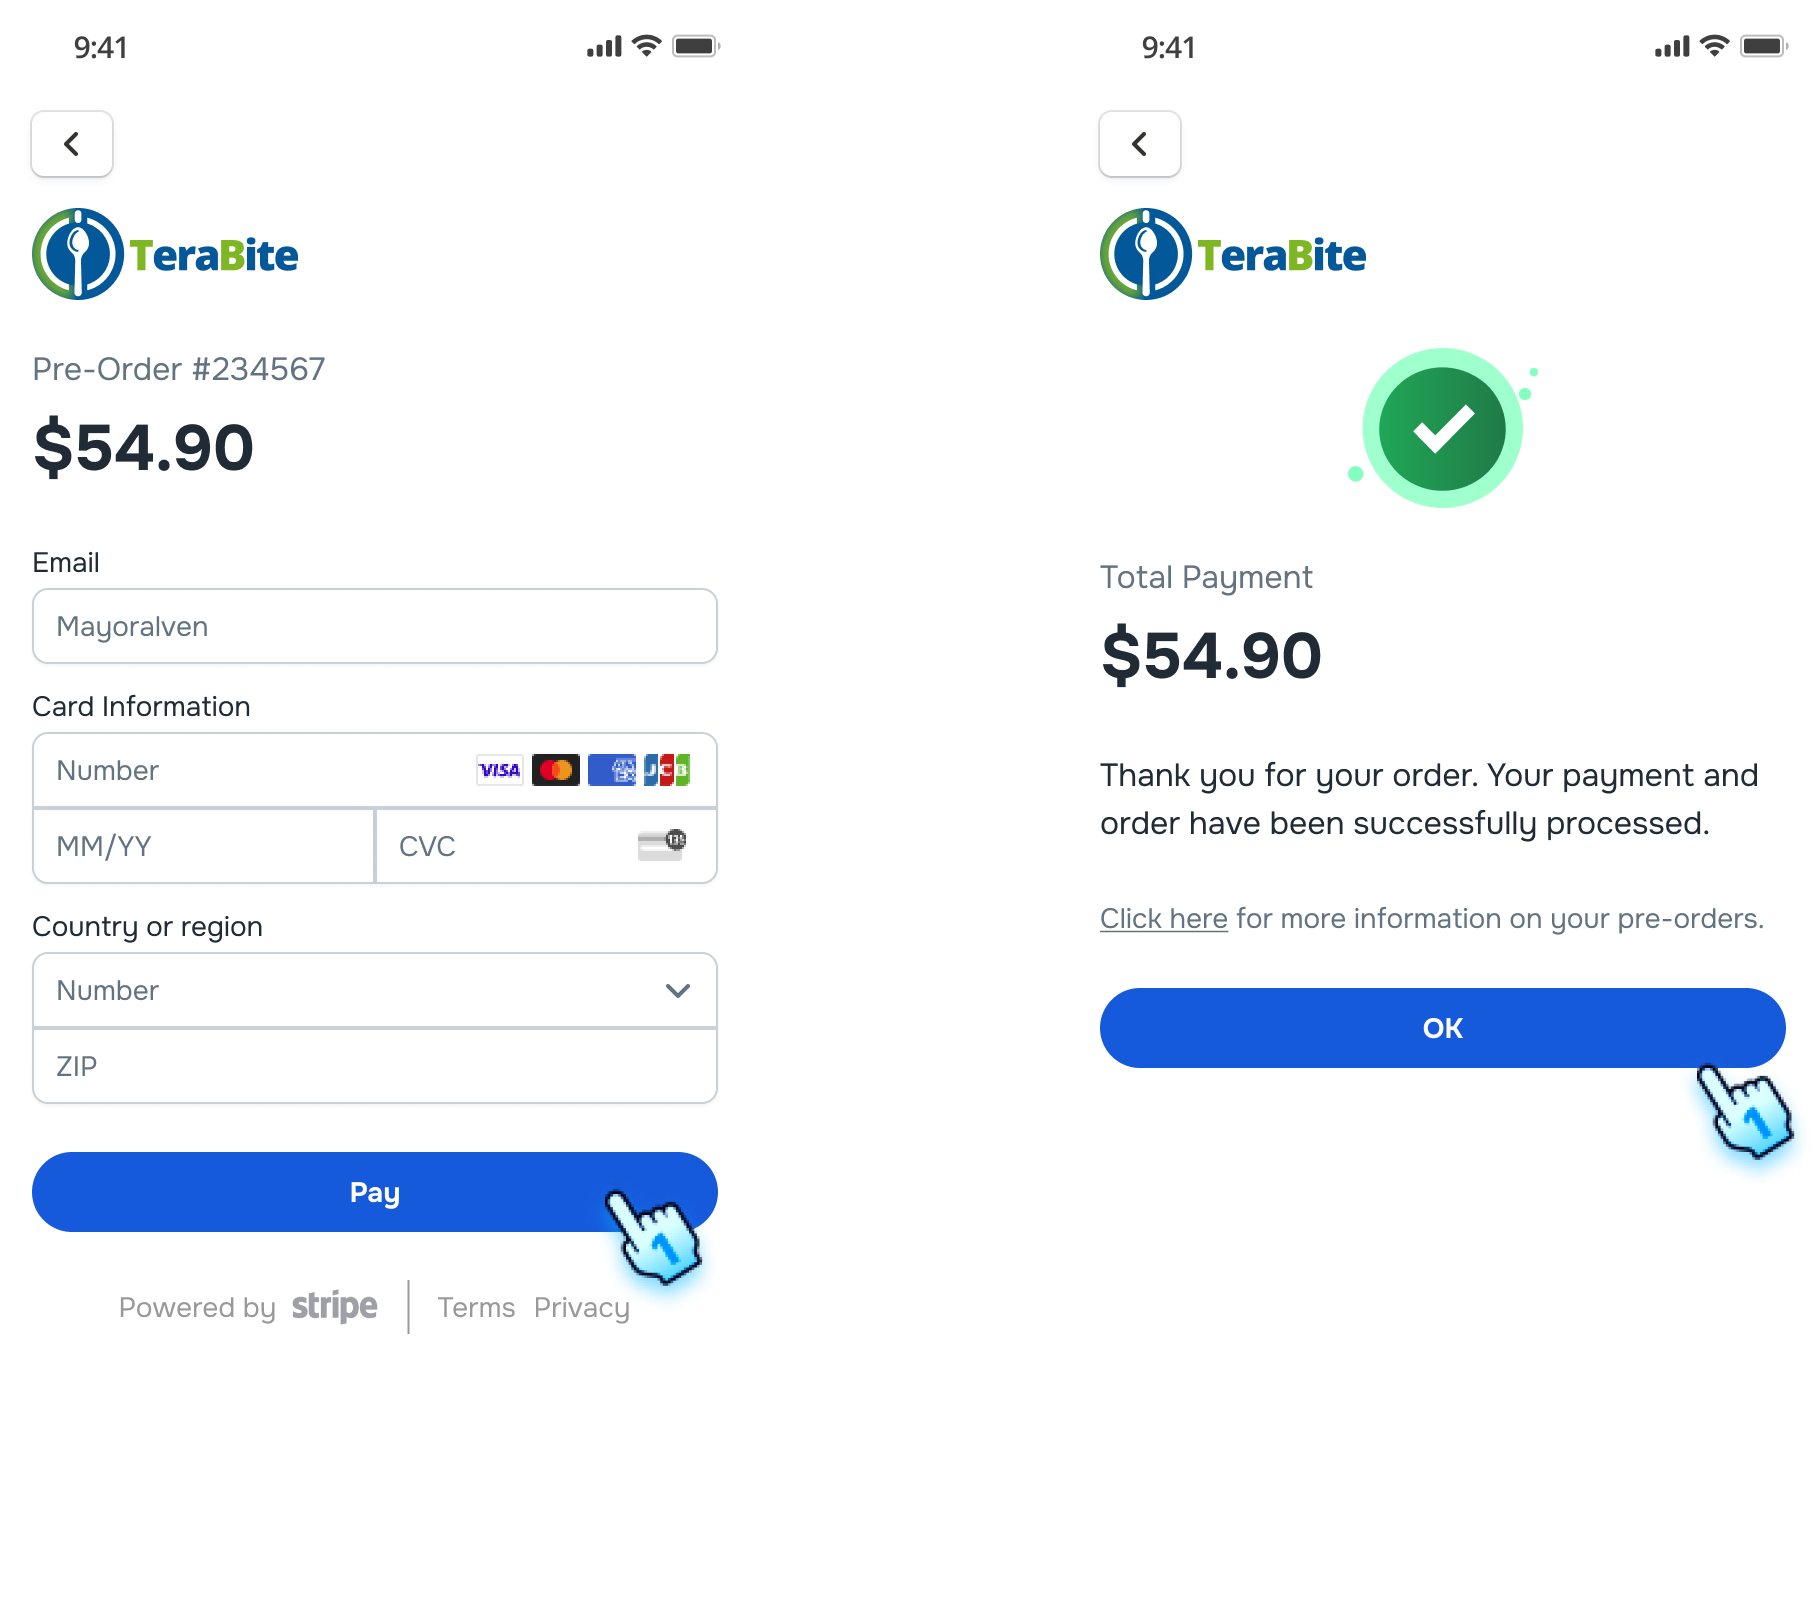
- Credit/ Debit card: Enter Card required information and Click "Pay" button to confirm payment
- A confirmation message will indicate that the pre-order has been successfully placed.
Review Created Pre-Orders
- Select the Created Pre-Orders
- Tap on Day card
- The Calendar will display including:
- White: Empty order
- Purple dash: Pre-Orders created
- Red dash: Items added
- Underscored: Today
- Tap on Purple-Dash Day to display the Created Pre-Order
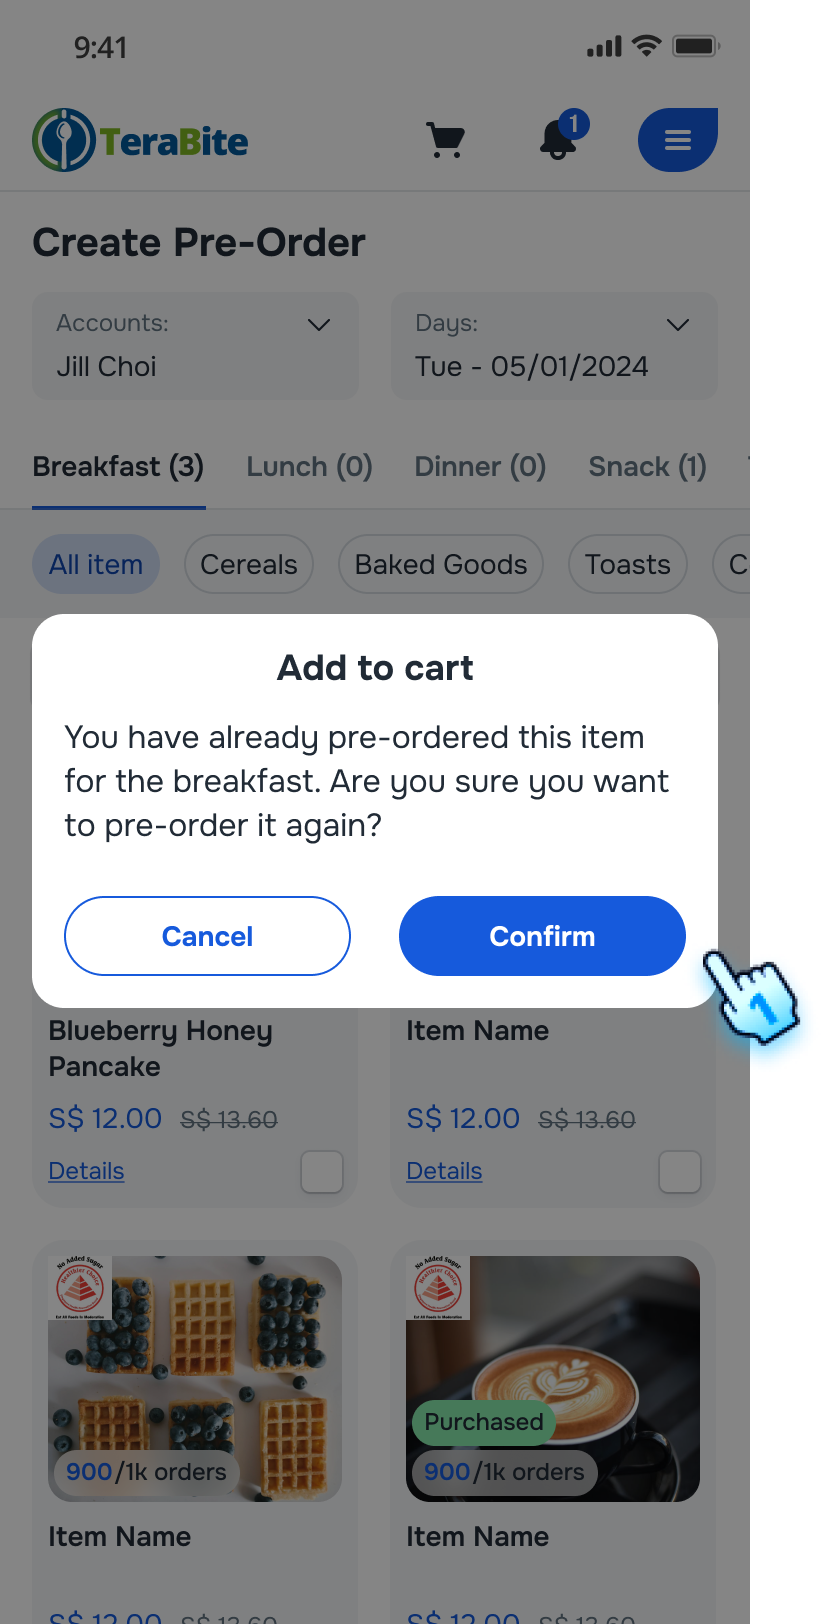
- Attempt to Add Purchased Items
- After select the Created Pre-Order day, Tap the checkbox next to each purchased item to add it to the pre-order.
- Click "Confirm" button on the confirmation dialog
- The item is added in cart
Conclusion
The Pre-Order Menu section provides a detailed guide for placing and managing meal pre-orders. By following these steps, users can efficiently select items, adjust quantities, and complete their orders, ensuring a seamless ordering experience.
Screen flow
Navigate to Meal Pre-Order
Select Items and Adjust Quantity
Add Notes and Complete Order
Review Created Pre-Orders