Banned Item Management
Description
This document outlines the procedures for managing banned items within the application.
Manage Banned Items
- Access to Banned item list
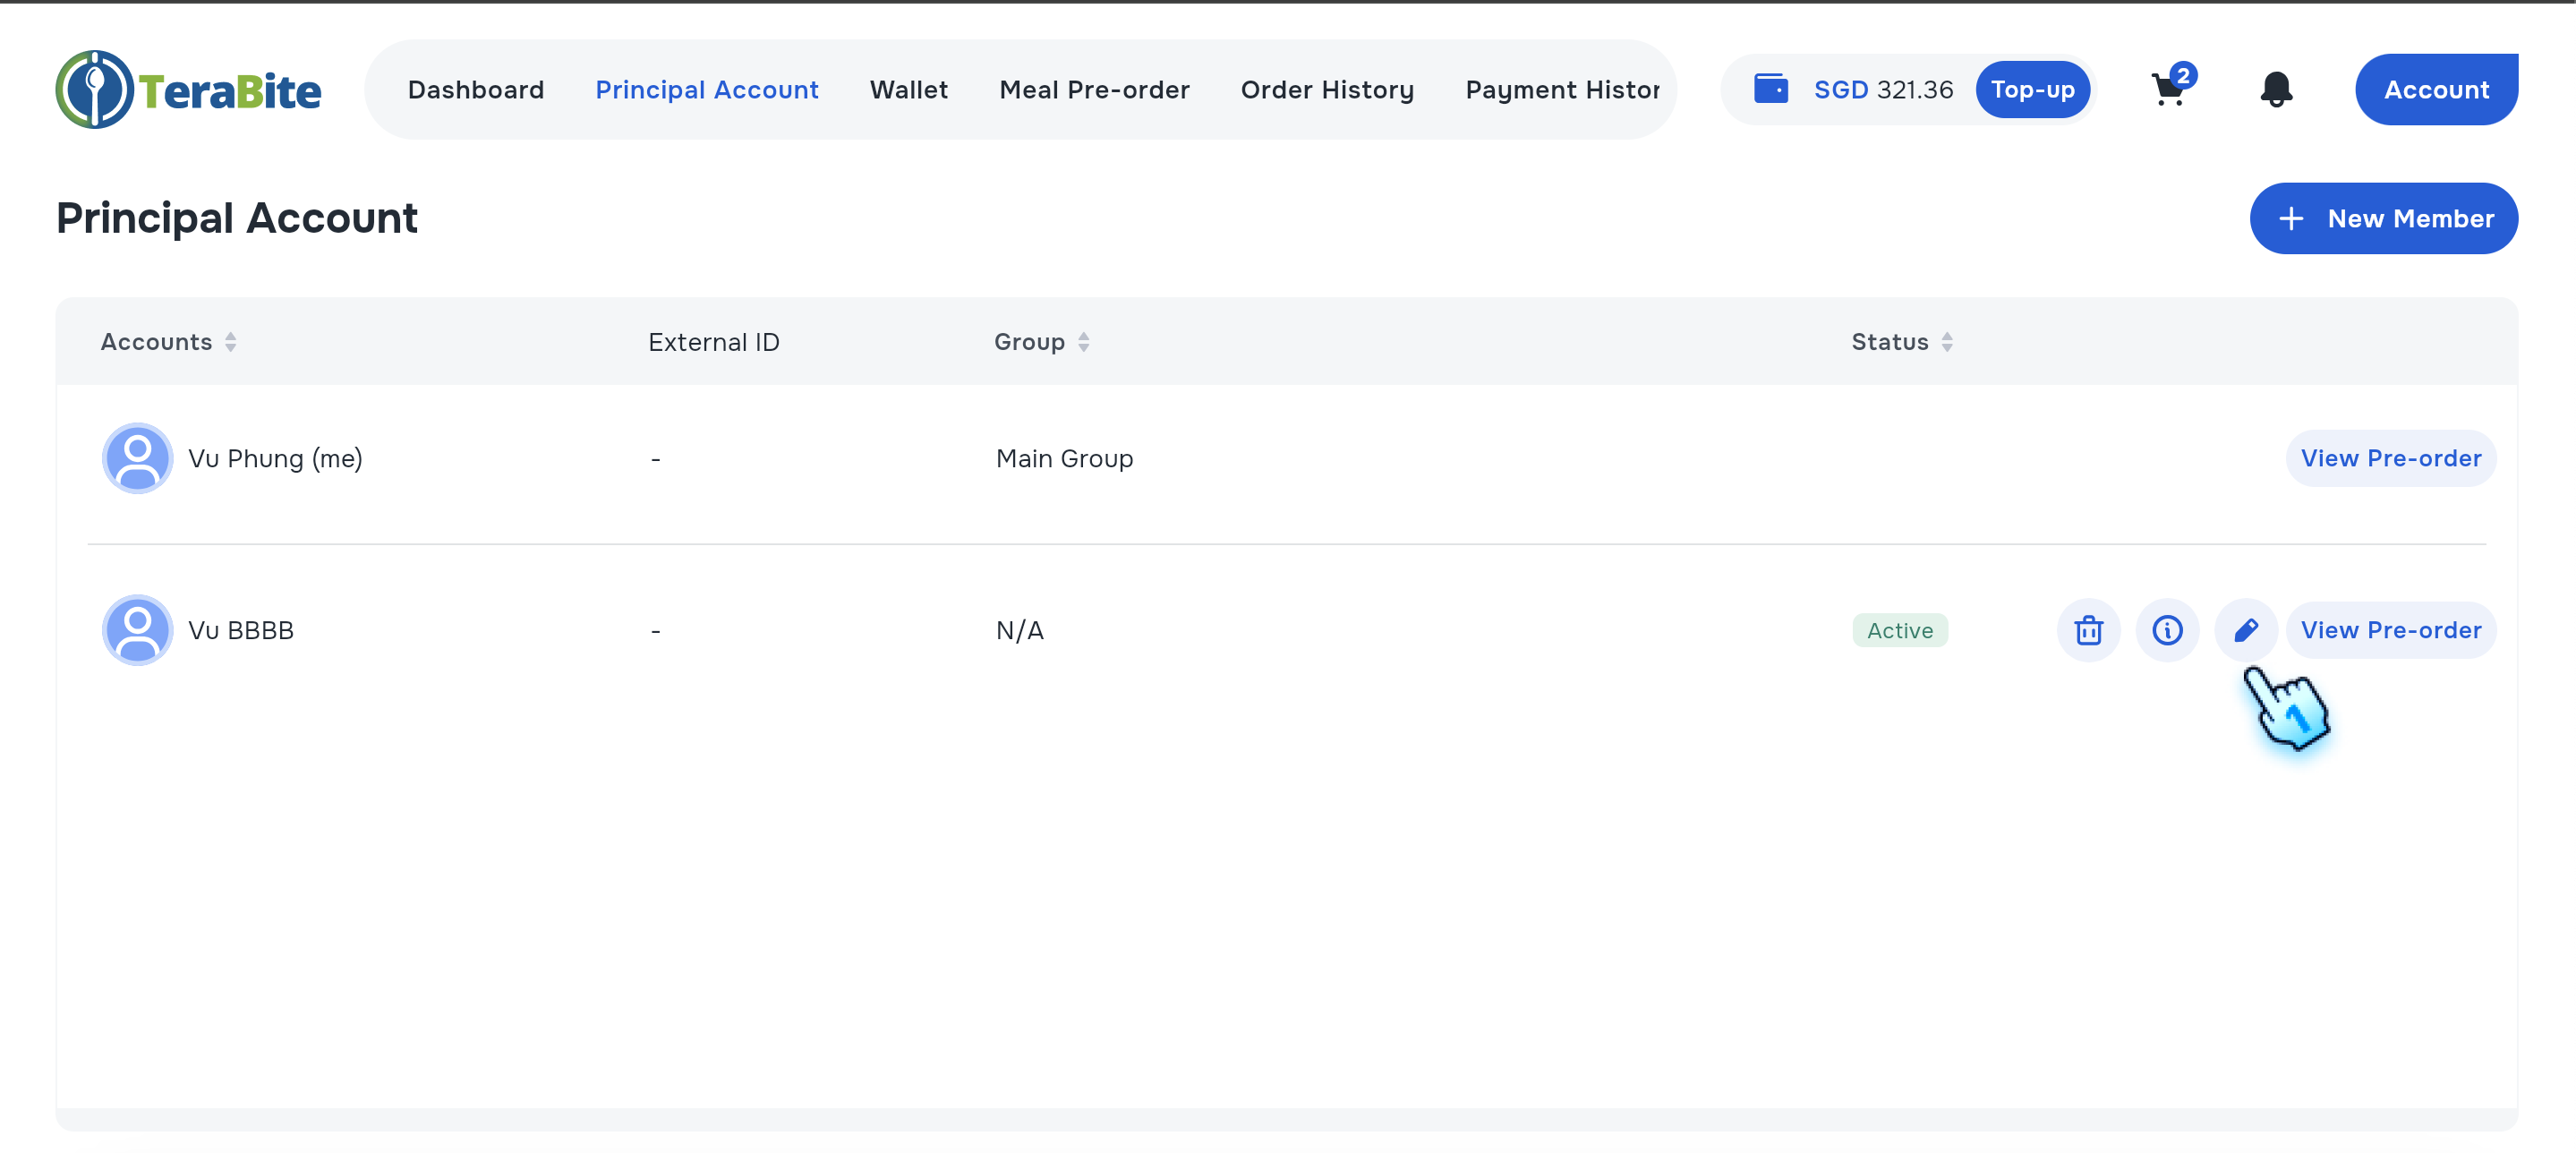
- Navigate to Principal Account
- Tap on Edit Account
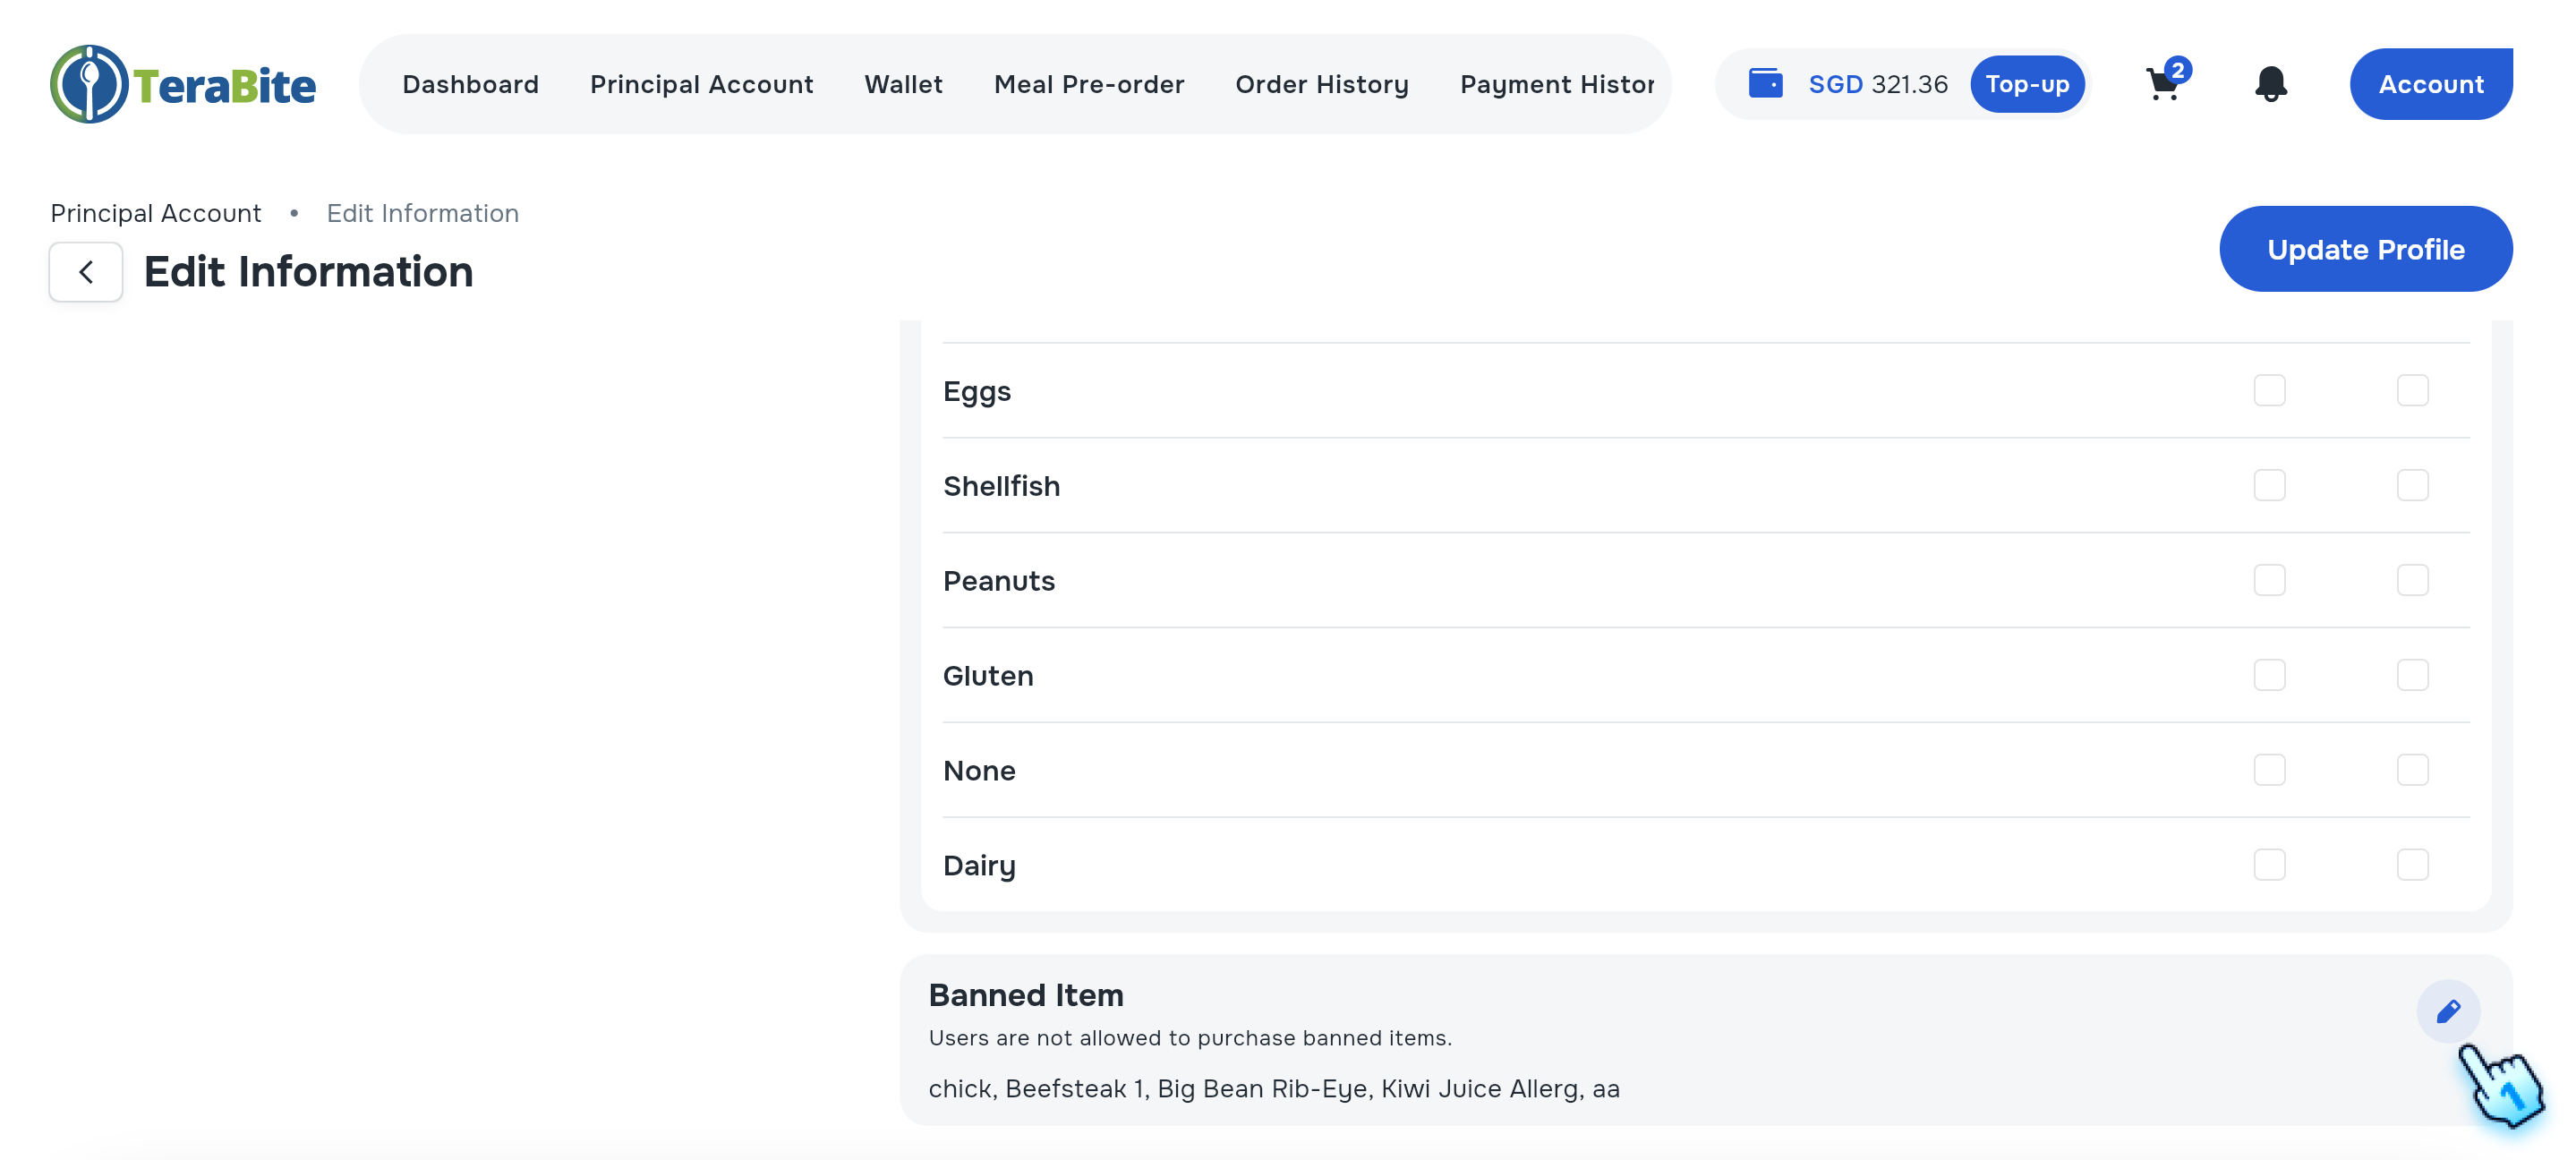
- Tap on Edit button right at Banned Items section

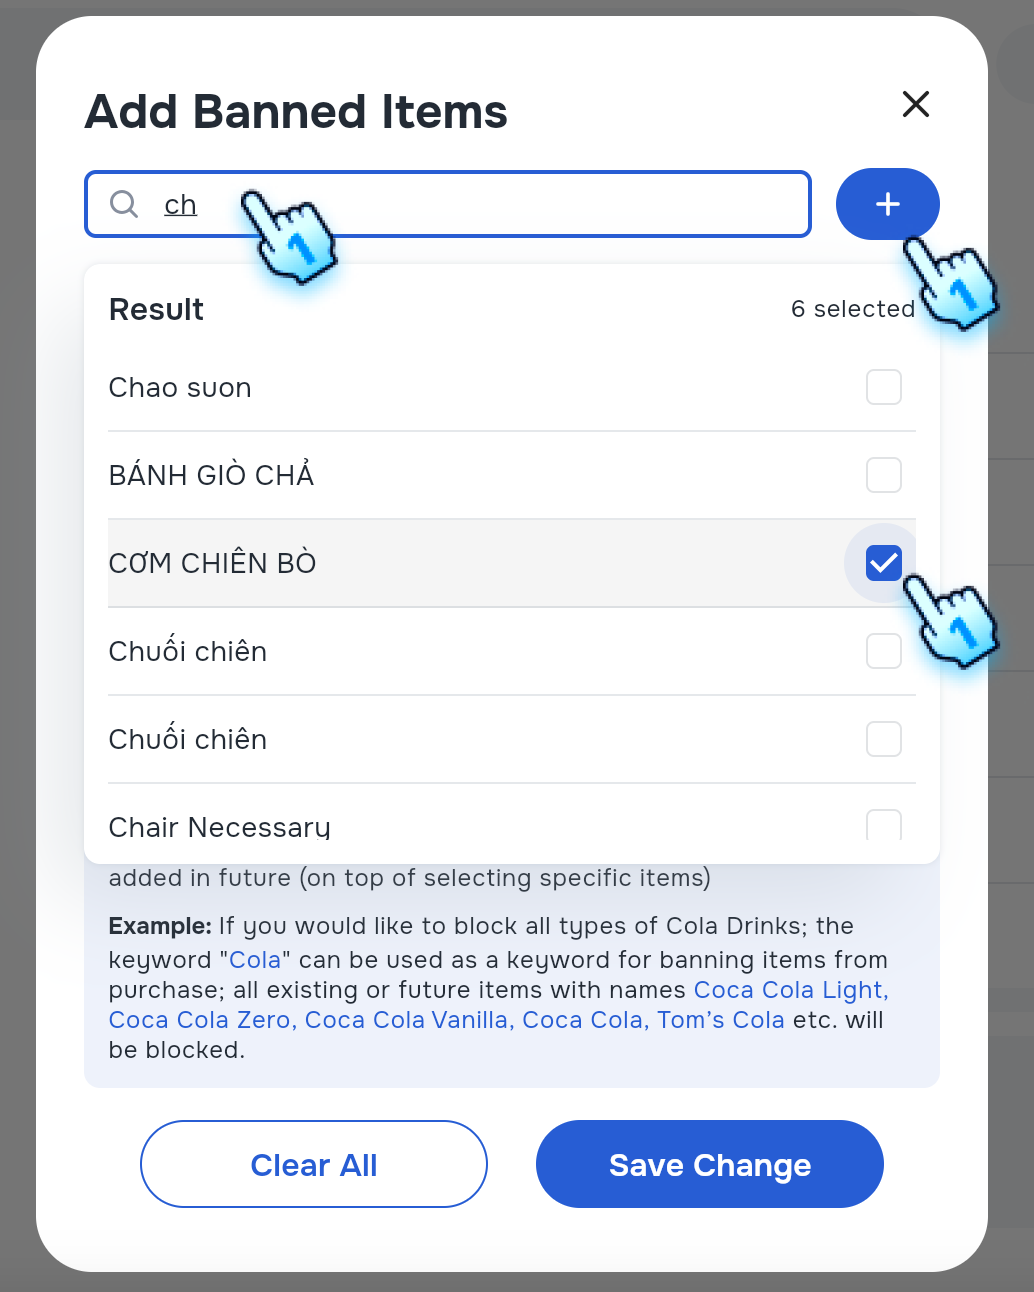
- Add Banned Item
- Search by keyword and Check on the items to add to the Banned items list
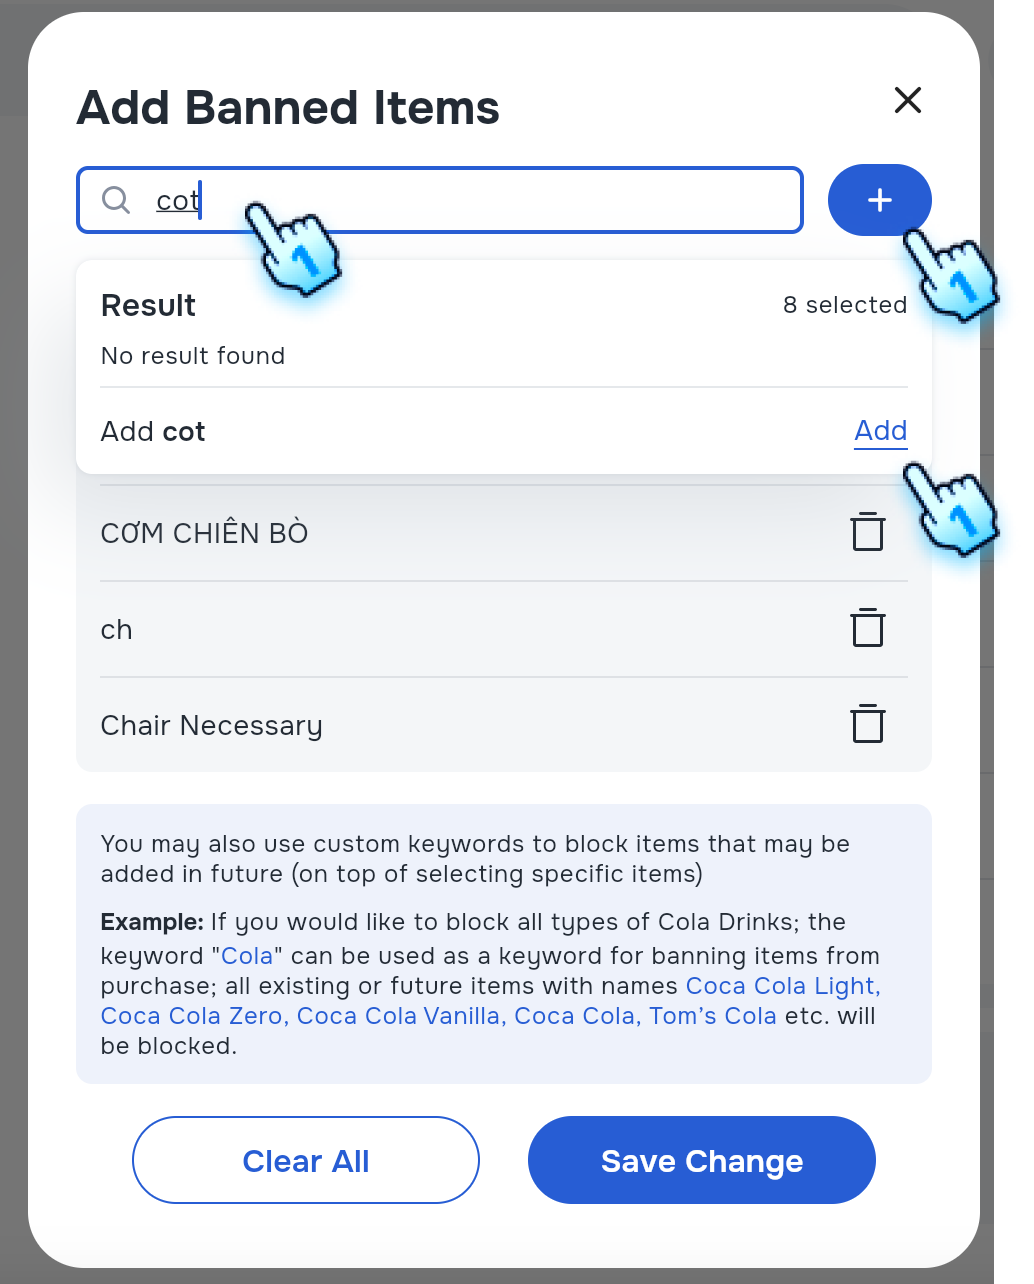
- Add Banned Item Using Custom Product Keyword
- Input custom product keyword to ban
- Tap "Add" button or "+" button to add a custom product keyword
Note: You may also use custom keywords to block items that may be added in future (on top of selecting specific items) Example: If you would like to block all types of Cola Drinks; the keyword “Cola” can be used as a keyword for banning items from purchase; all existing or future items with names Coca Cola Light, Coca Cola Zero, Coca Cola Vanilla, Coca Cola, Tom’s Cola etc. will be blocked.
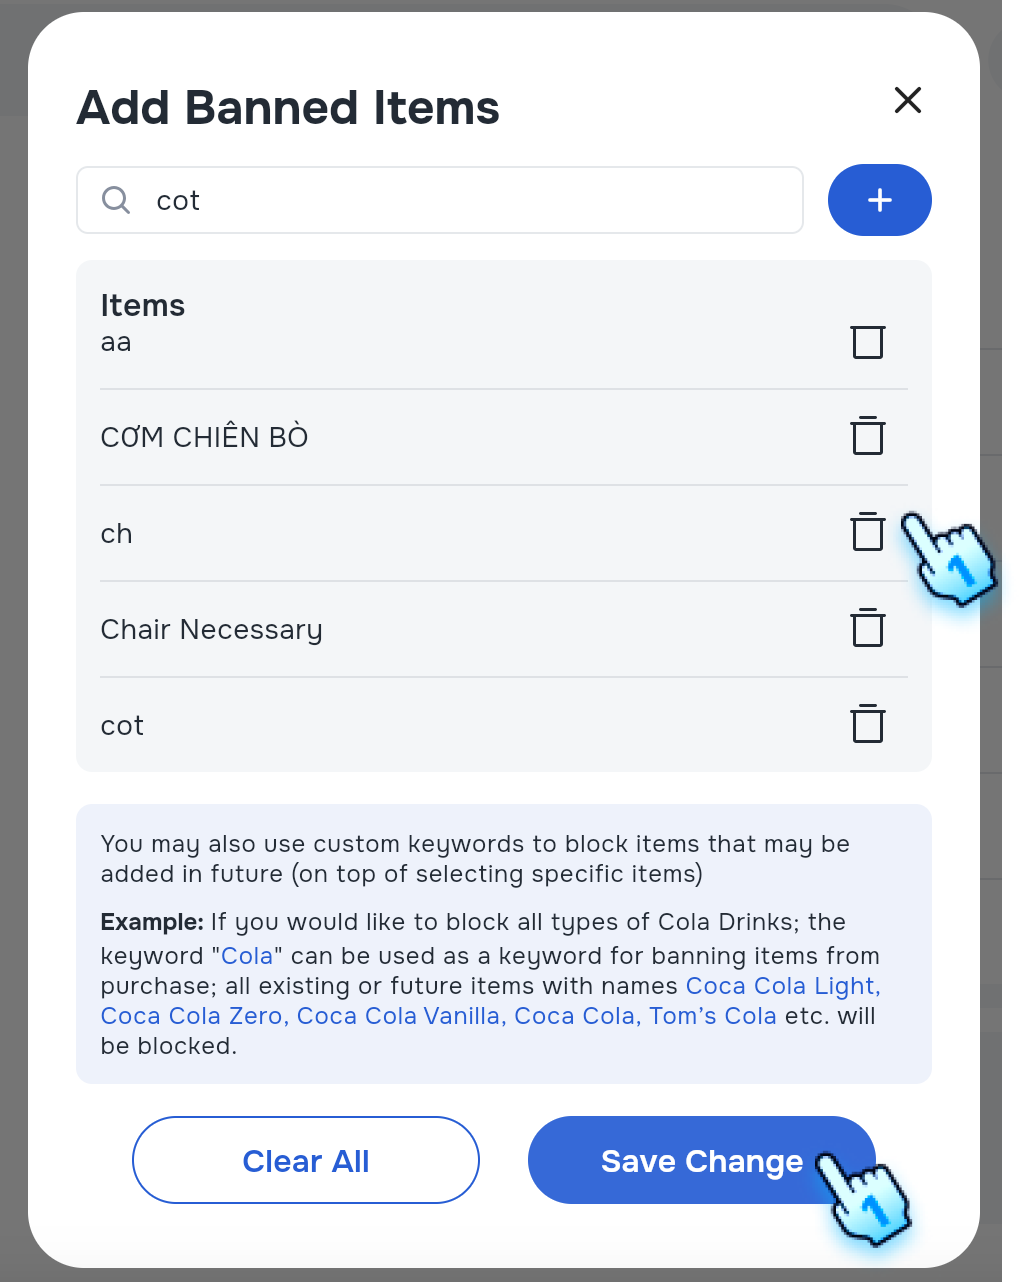
- Save editting
- Tap on "Save Change" to save editing and block all items in the list
Check Purchase Restrictions
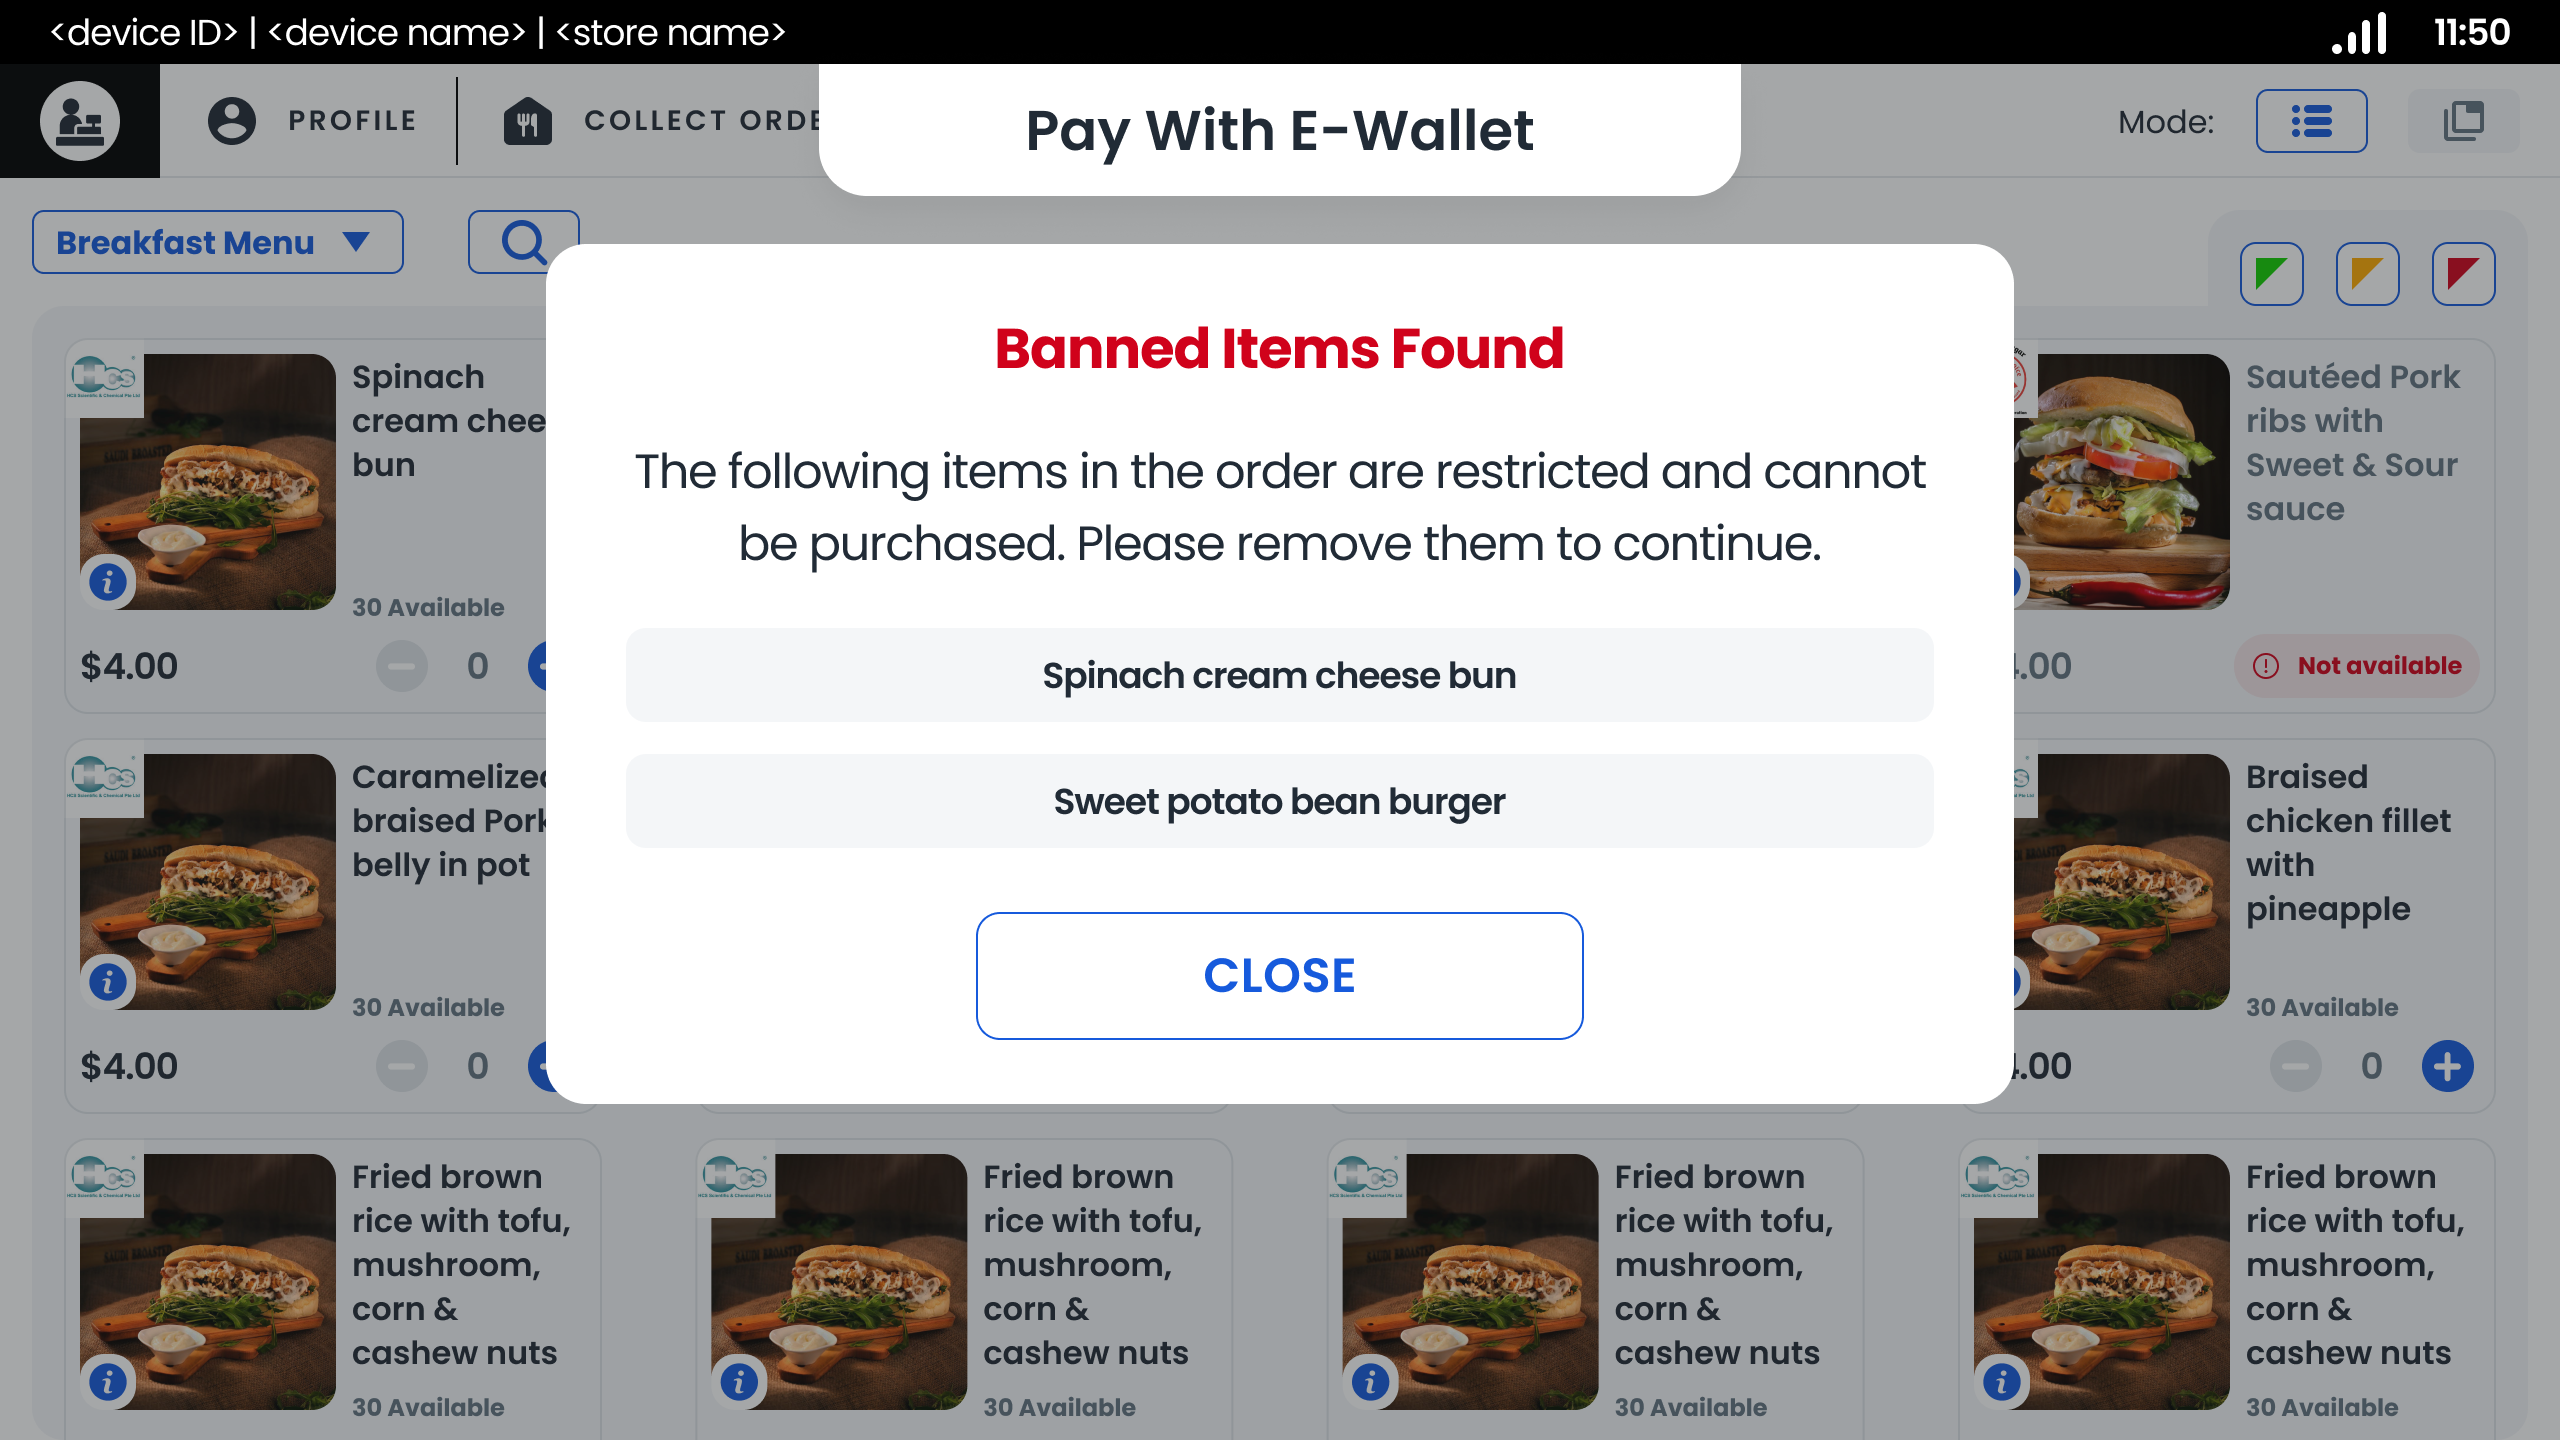
- Check Blocked Purchase After Adding Banned Items on POS
- Ensure that purchases are blocked after adding banned items on the POS.
- Check Blocked Purchase After Adding Banned Items Using Custom Product Keyword on POS
- Ensure that purchases are blocked after adding banned items with custom product keyword on the POS.
Conclusion
This document provides a structured approach for managing banned items within the application, ensuring proper handling of item additions and removals across different platforms.