Settings
Description
This document outlines the procedures for managing notifications within the Customer Portal.
Settings Management
- Navigate to the Setting
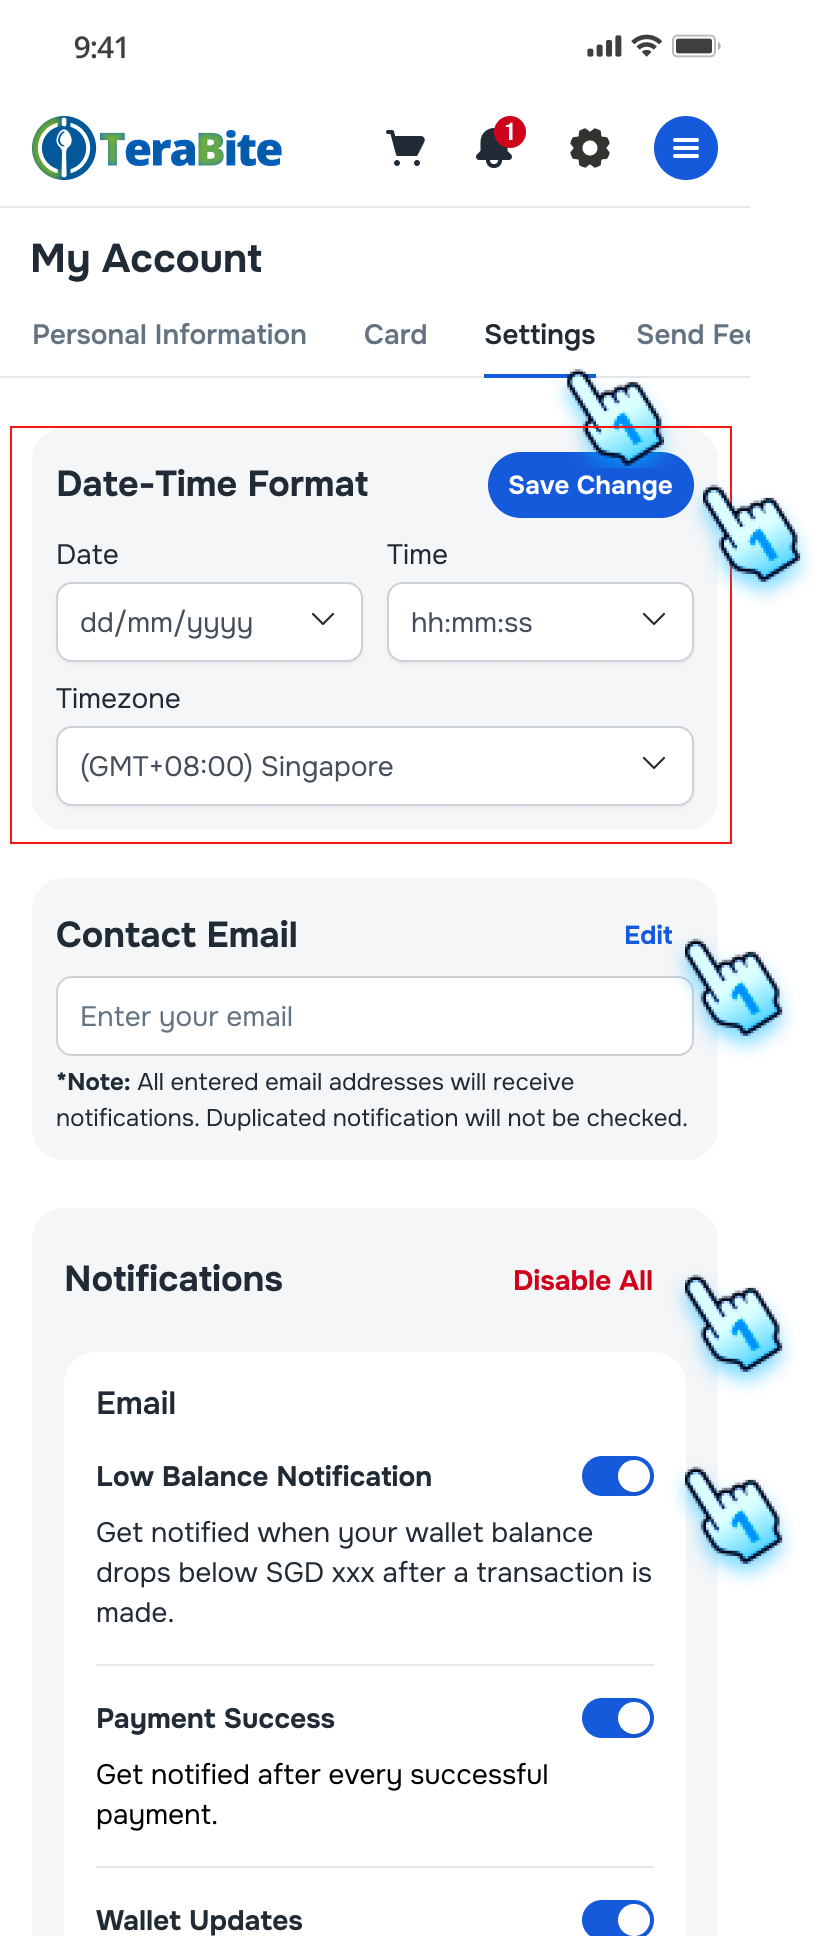
- Navigate to Settings tab by tapping on Gear button from the top navigation bar.
- Date Time format
- Select Date and Time format in the drop-down list
- Tap "Save Change" to complete the adjustment
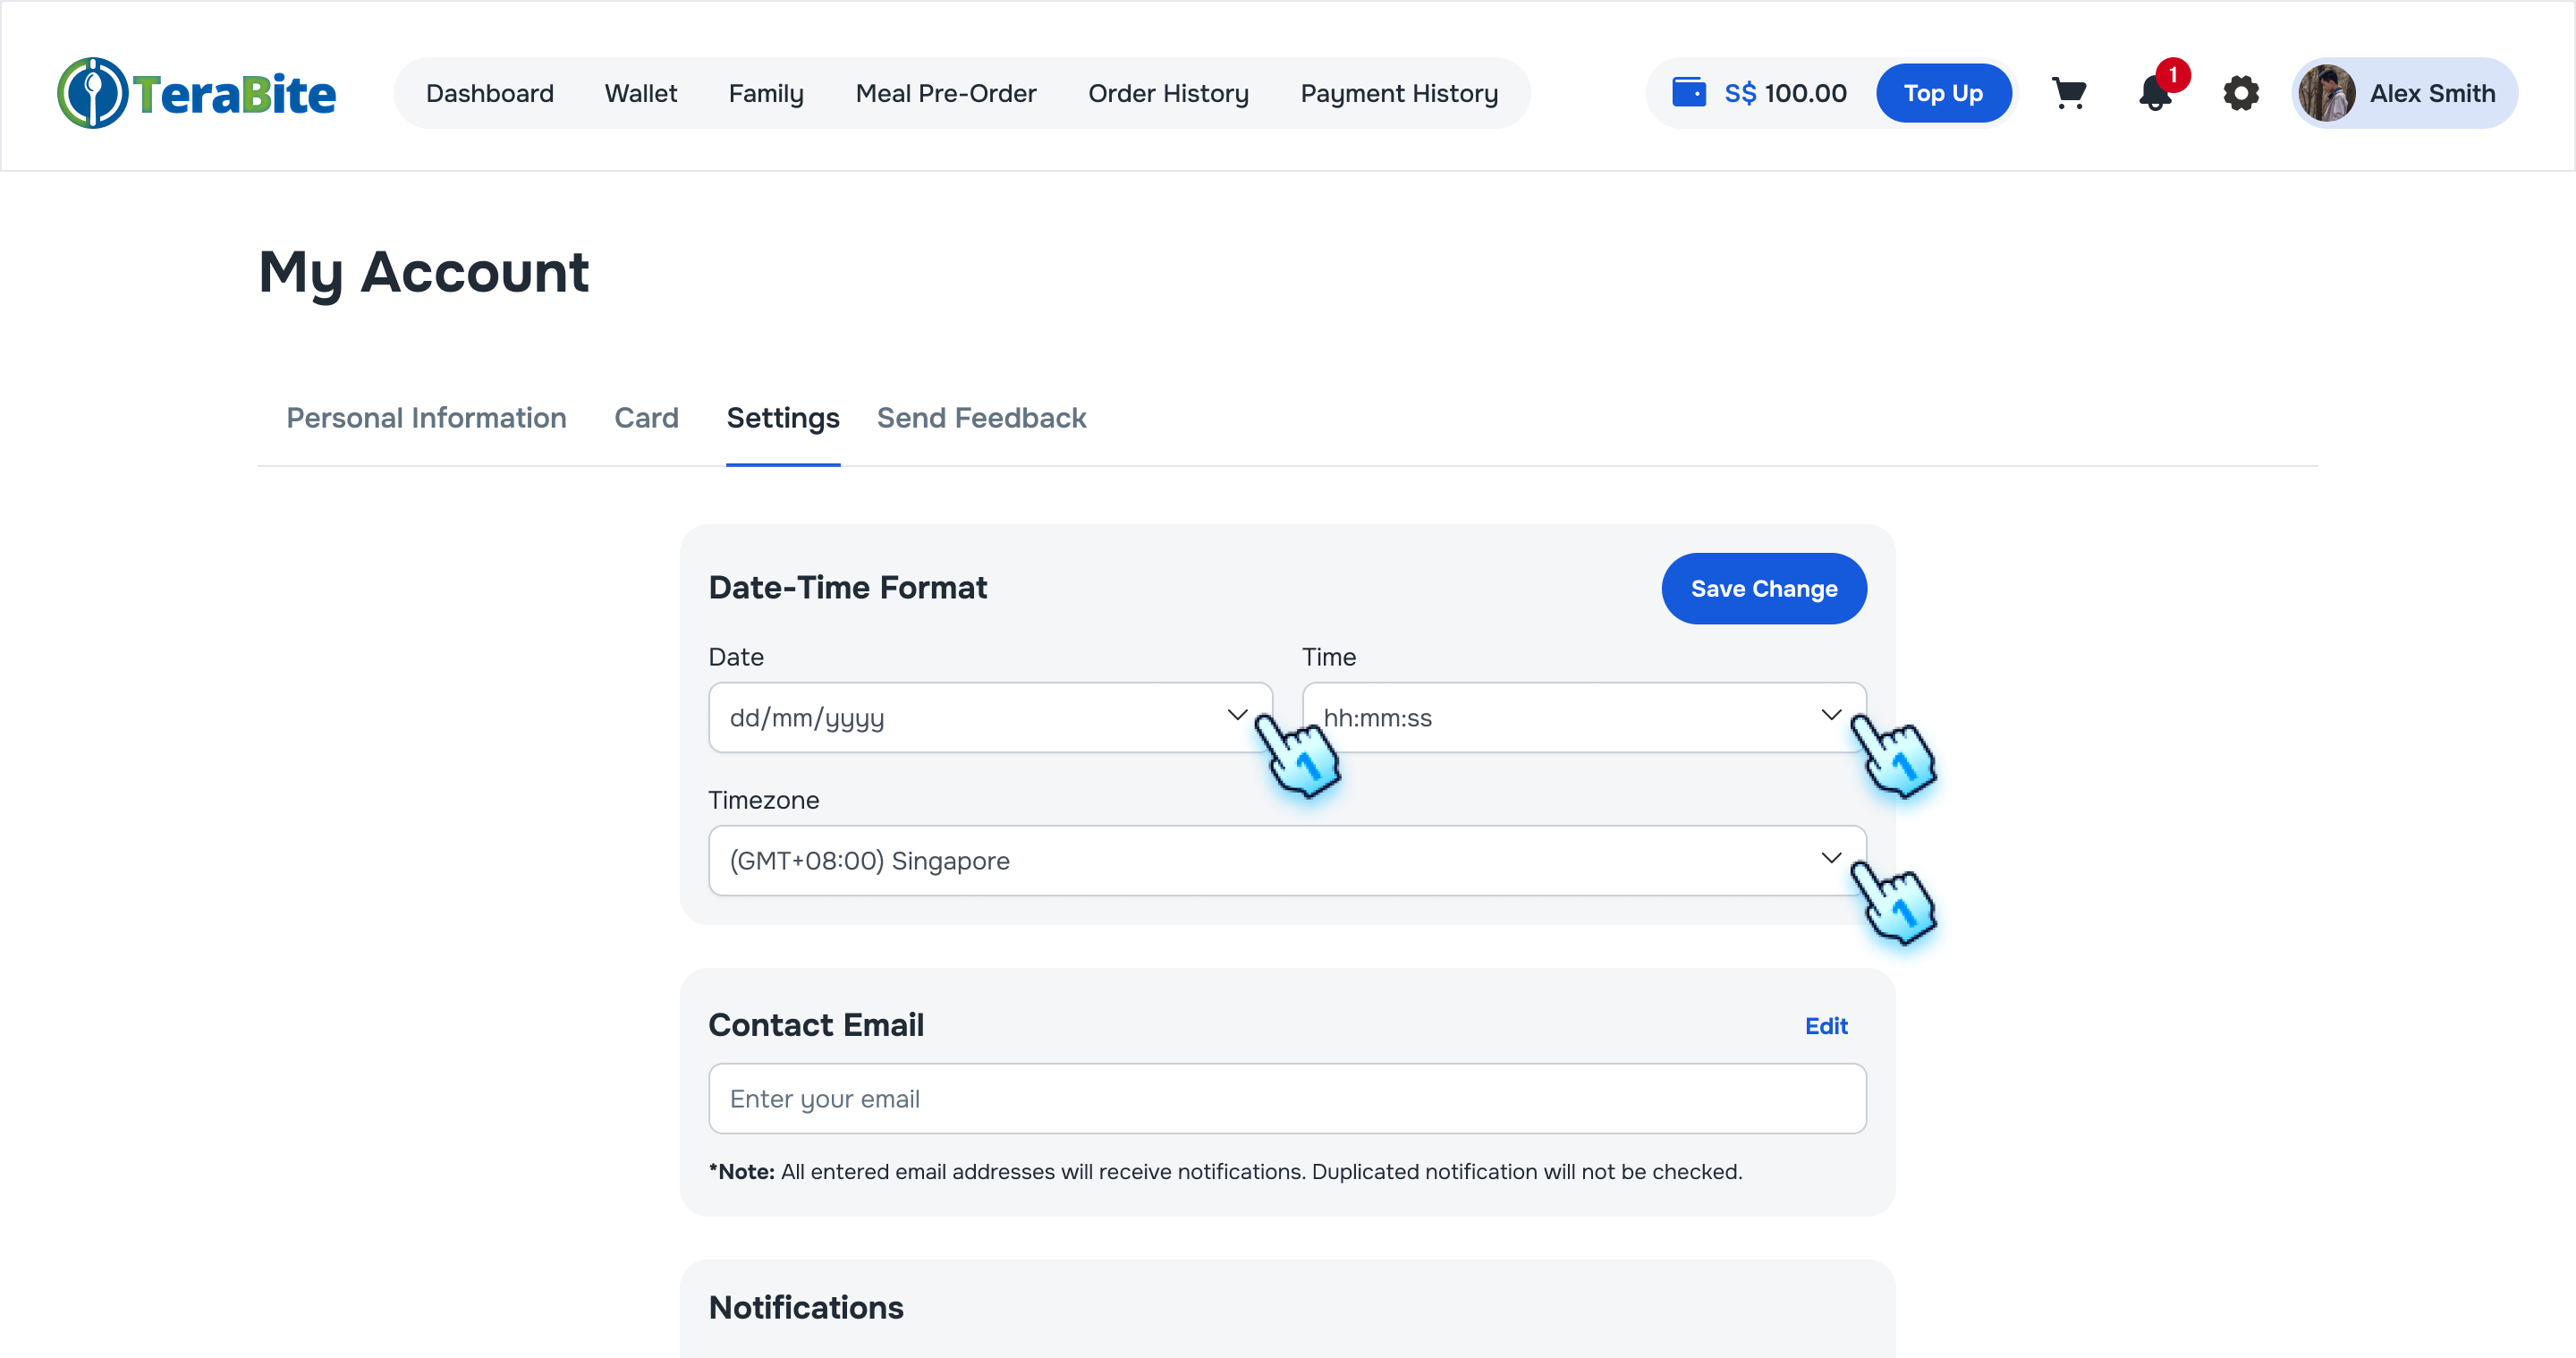
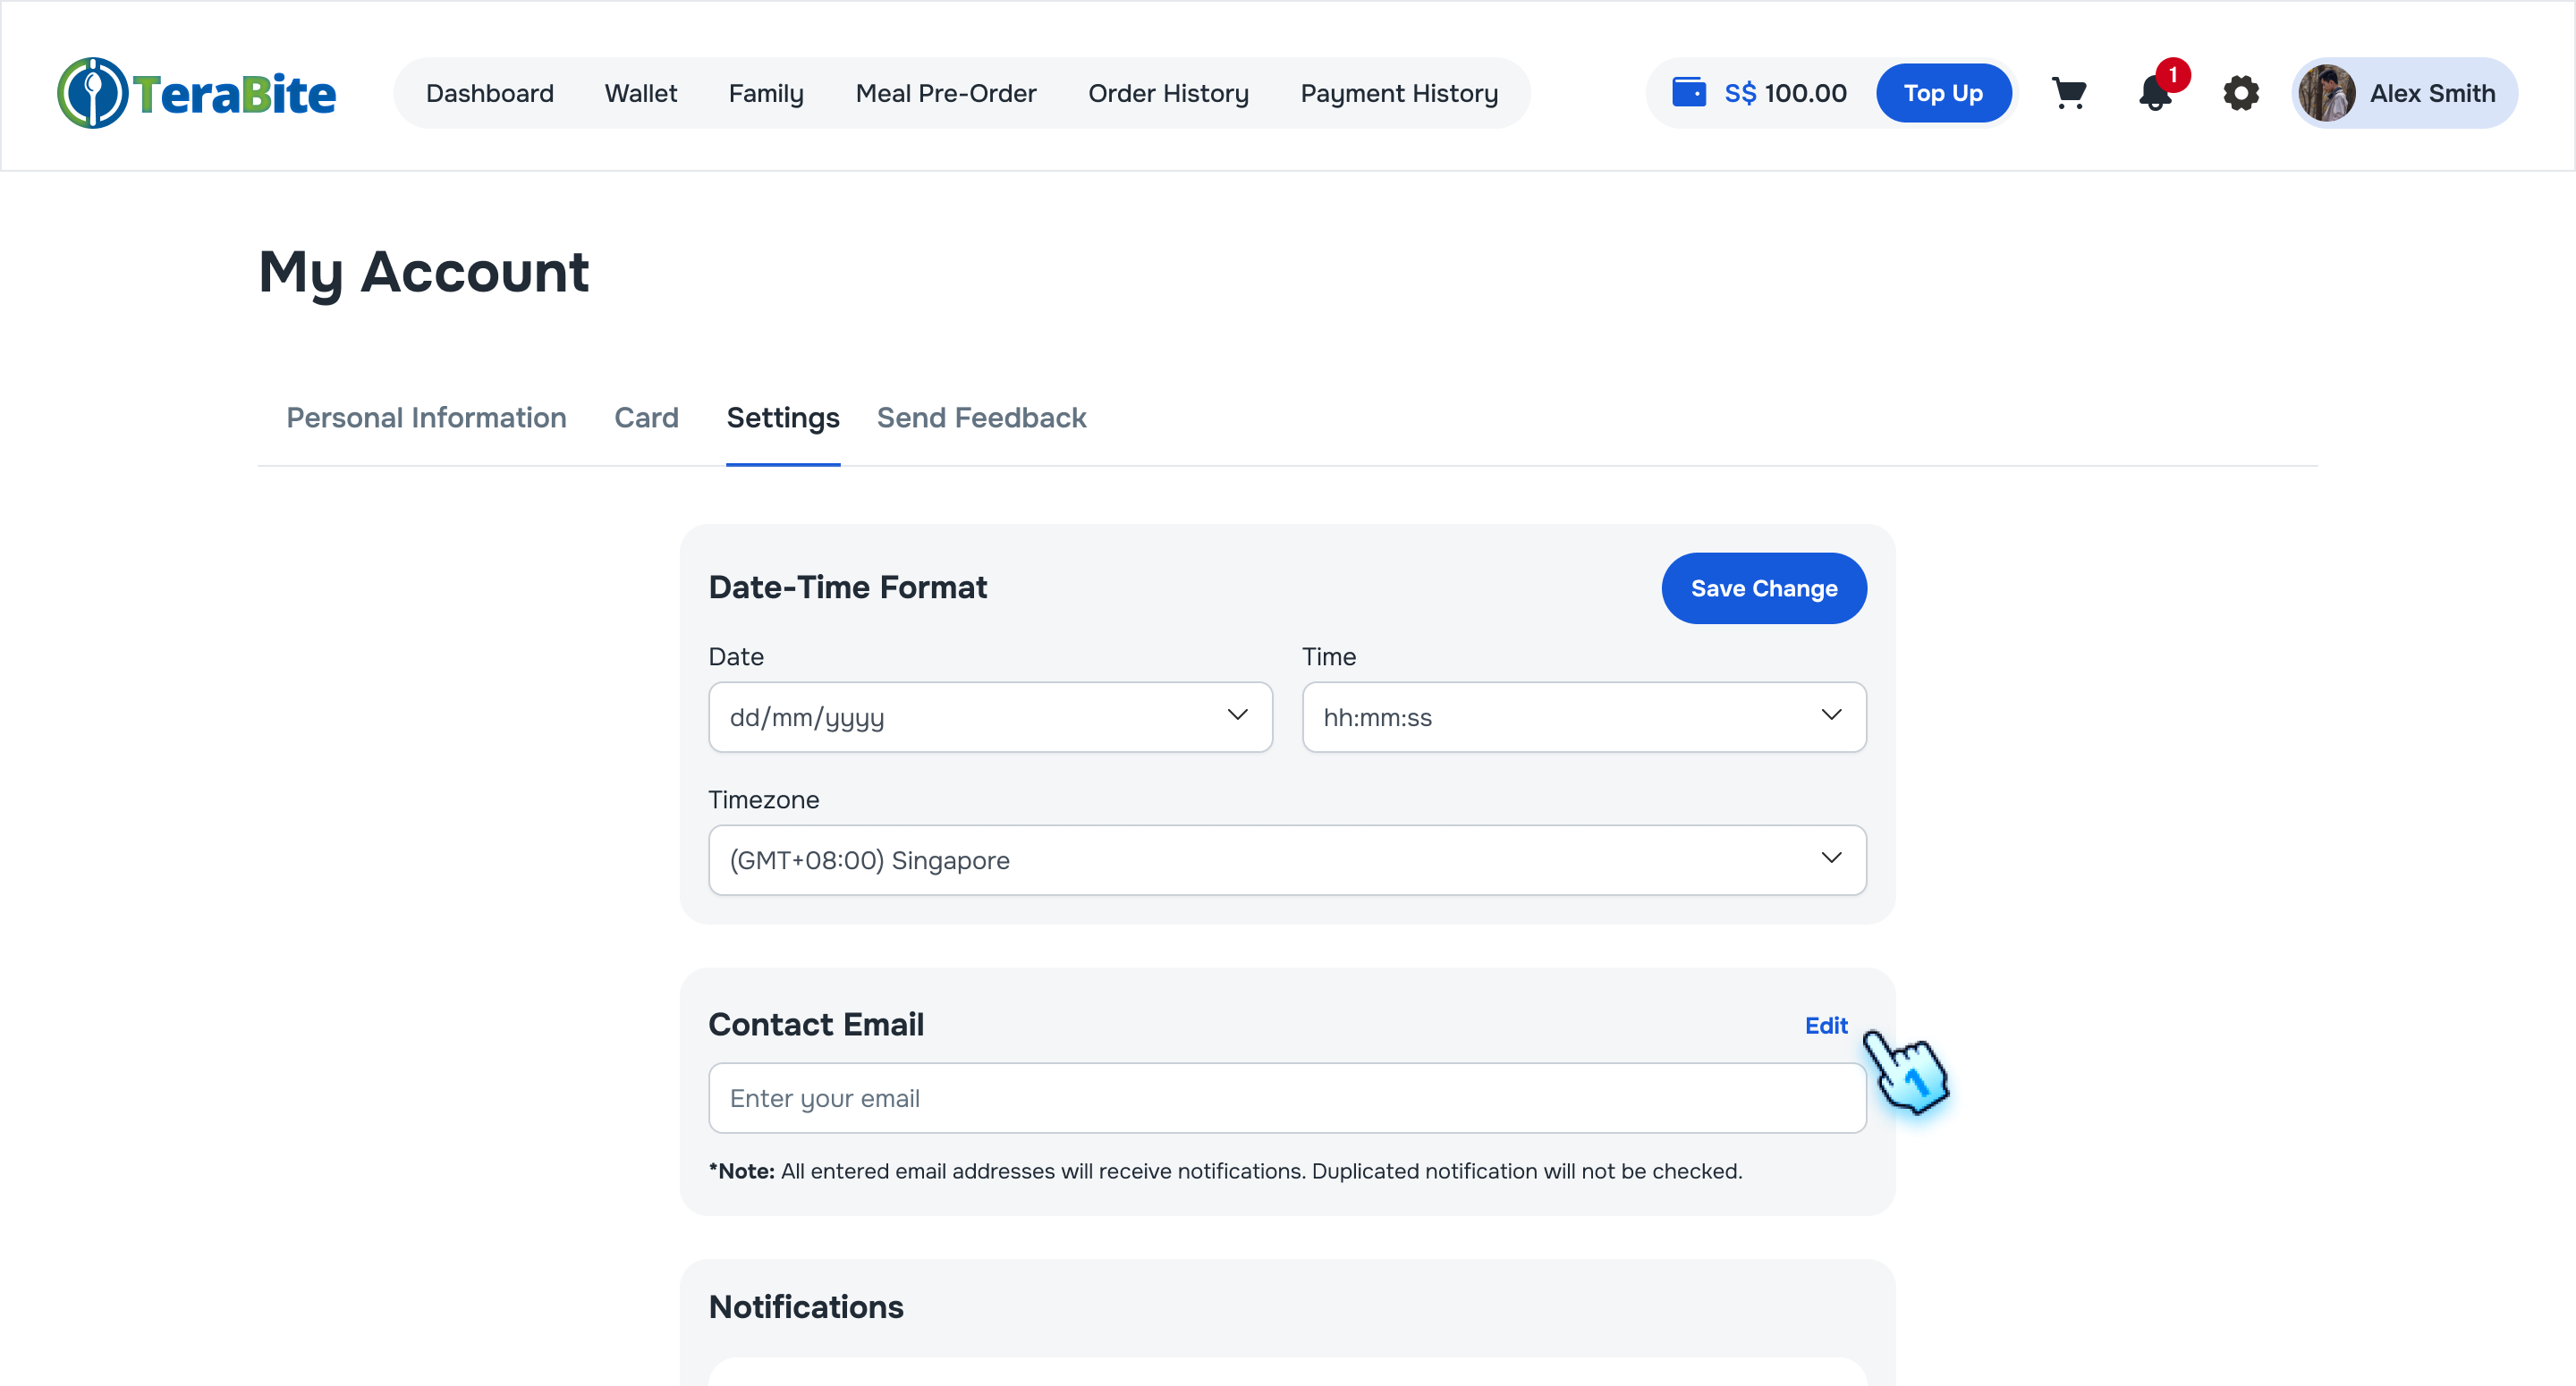
- Contact Email
- Tap "Edit" button to have a change
- Enter desired emails to receive notifications based on the notification settings below.
- Tap "Save" button to complete the action.
Note: Contact email settings are available for Parent role only.
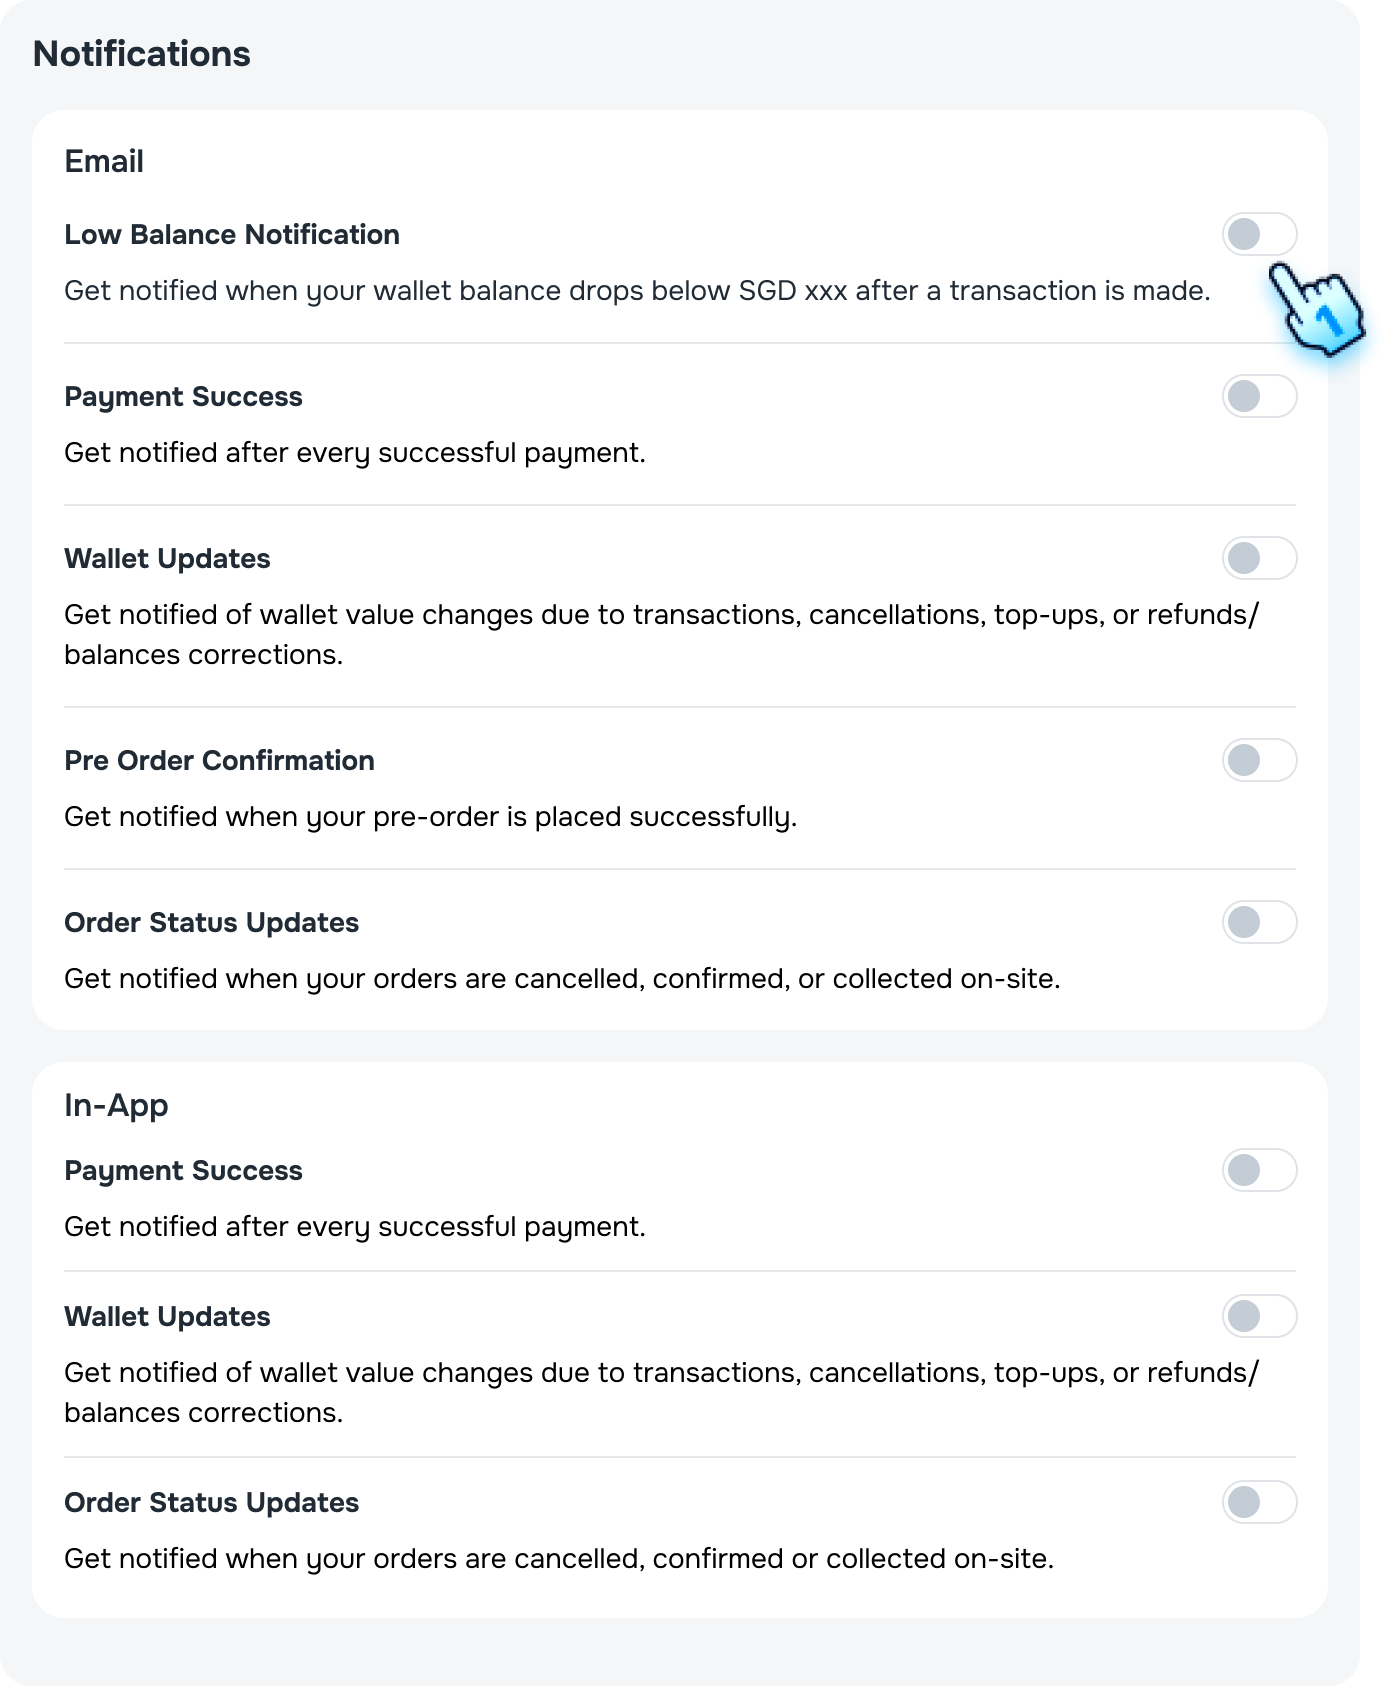
- Notification settings
-
Toggle each Email and/or In-app notification type to enable the notifications. Note:
- System removes duplicate recipients if one user qualifies by multiple roles.
- Only Parent role can enable Low Balance Notification.
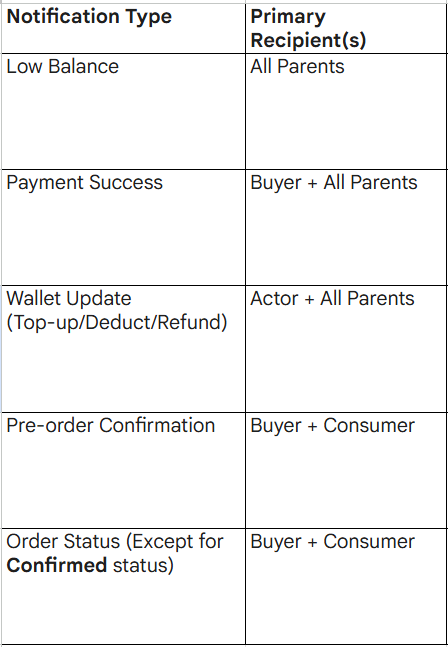
- Role-based notification
- System follow role-based notifications as an attached table.
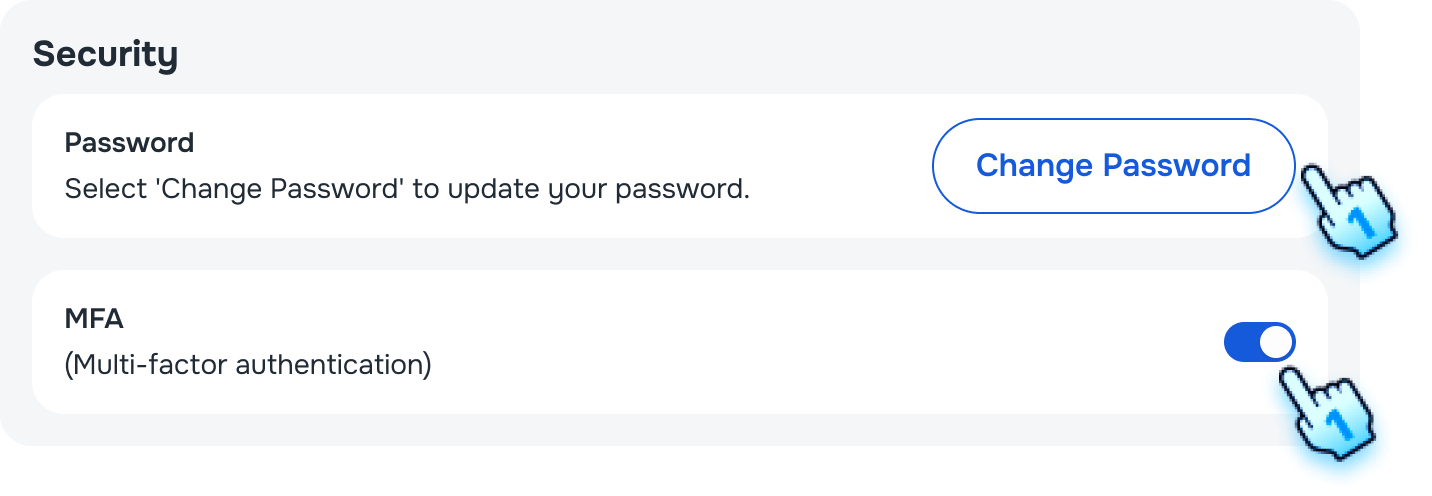
- Security settings
- Tap "Change password" and follow the similar steps as in Startup Activation section to change your password
- Toggle ON for MFA to enable MFA function.
Notification Viewing and Interaction
- Check Title and Content of Notification Include Timestamp
- User receives a notification and Tap on bell icon to views it.
- The title, content, and timestamp are displayed correctly.
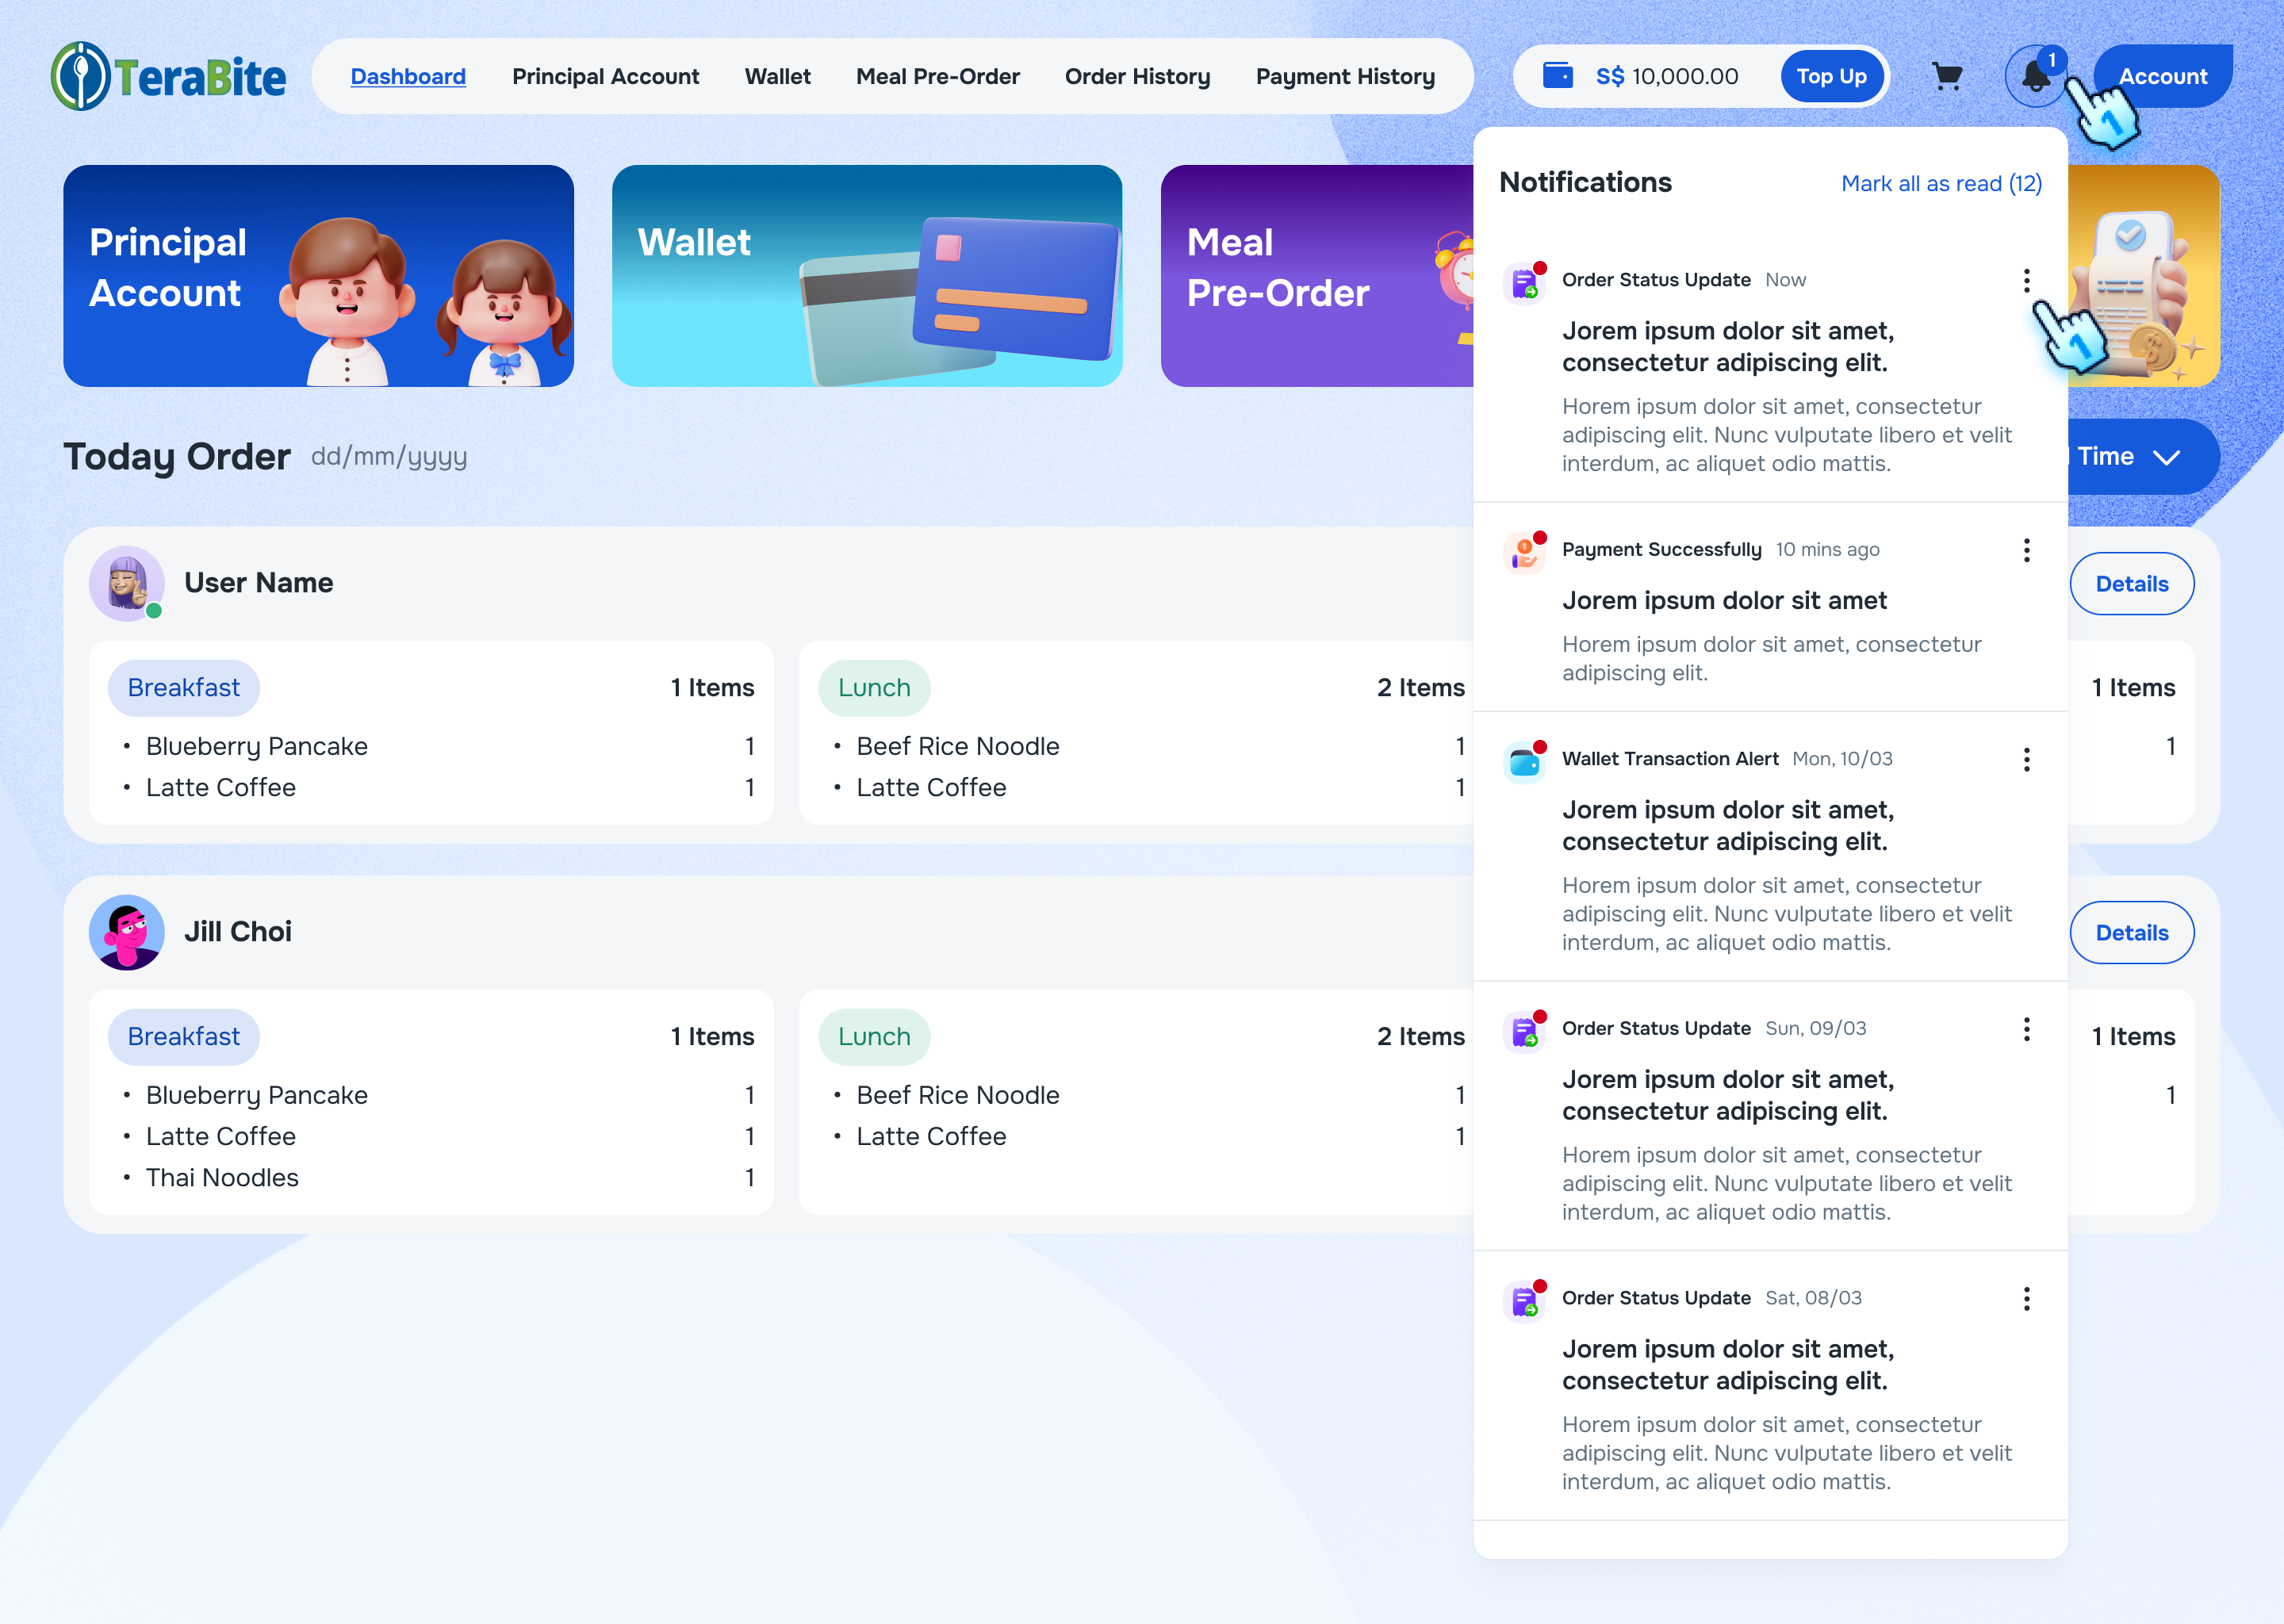
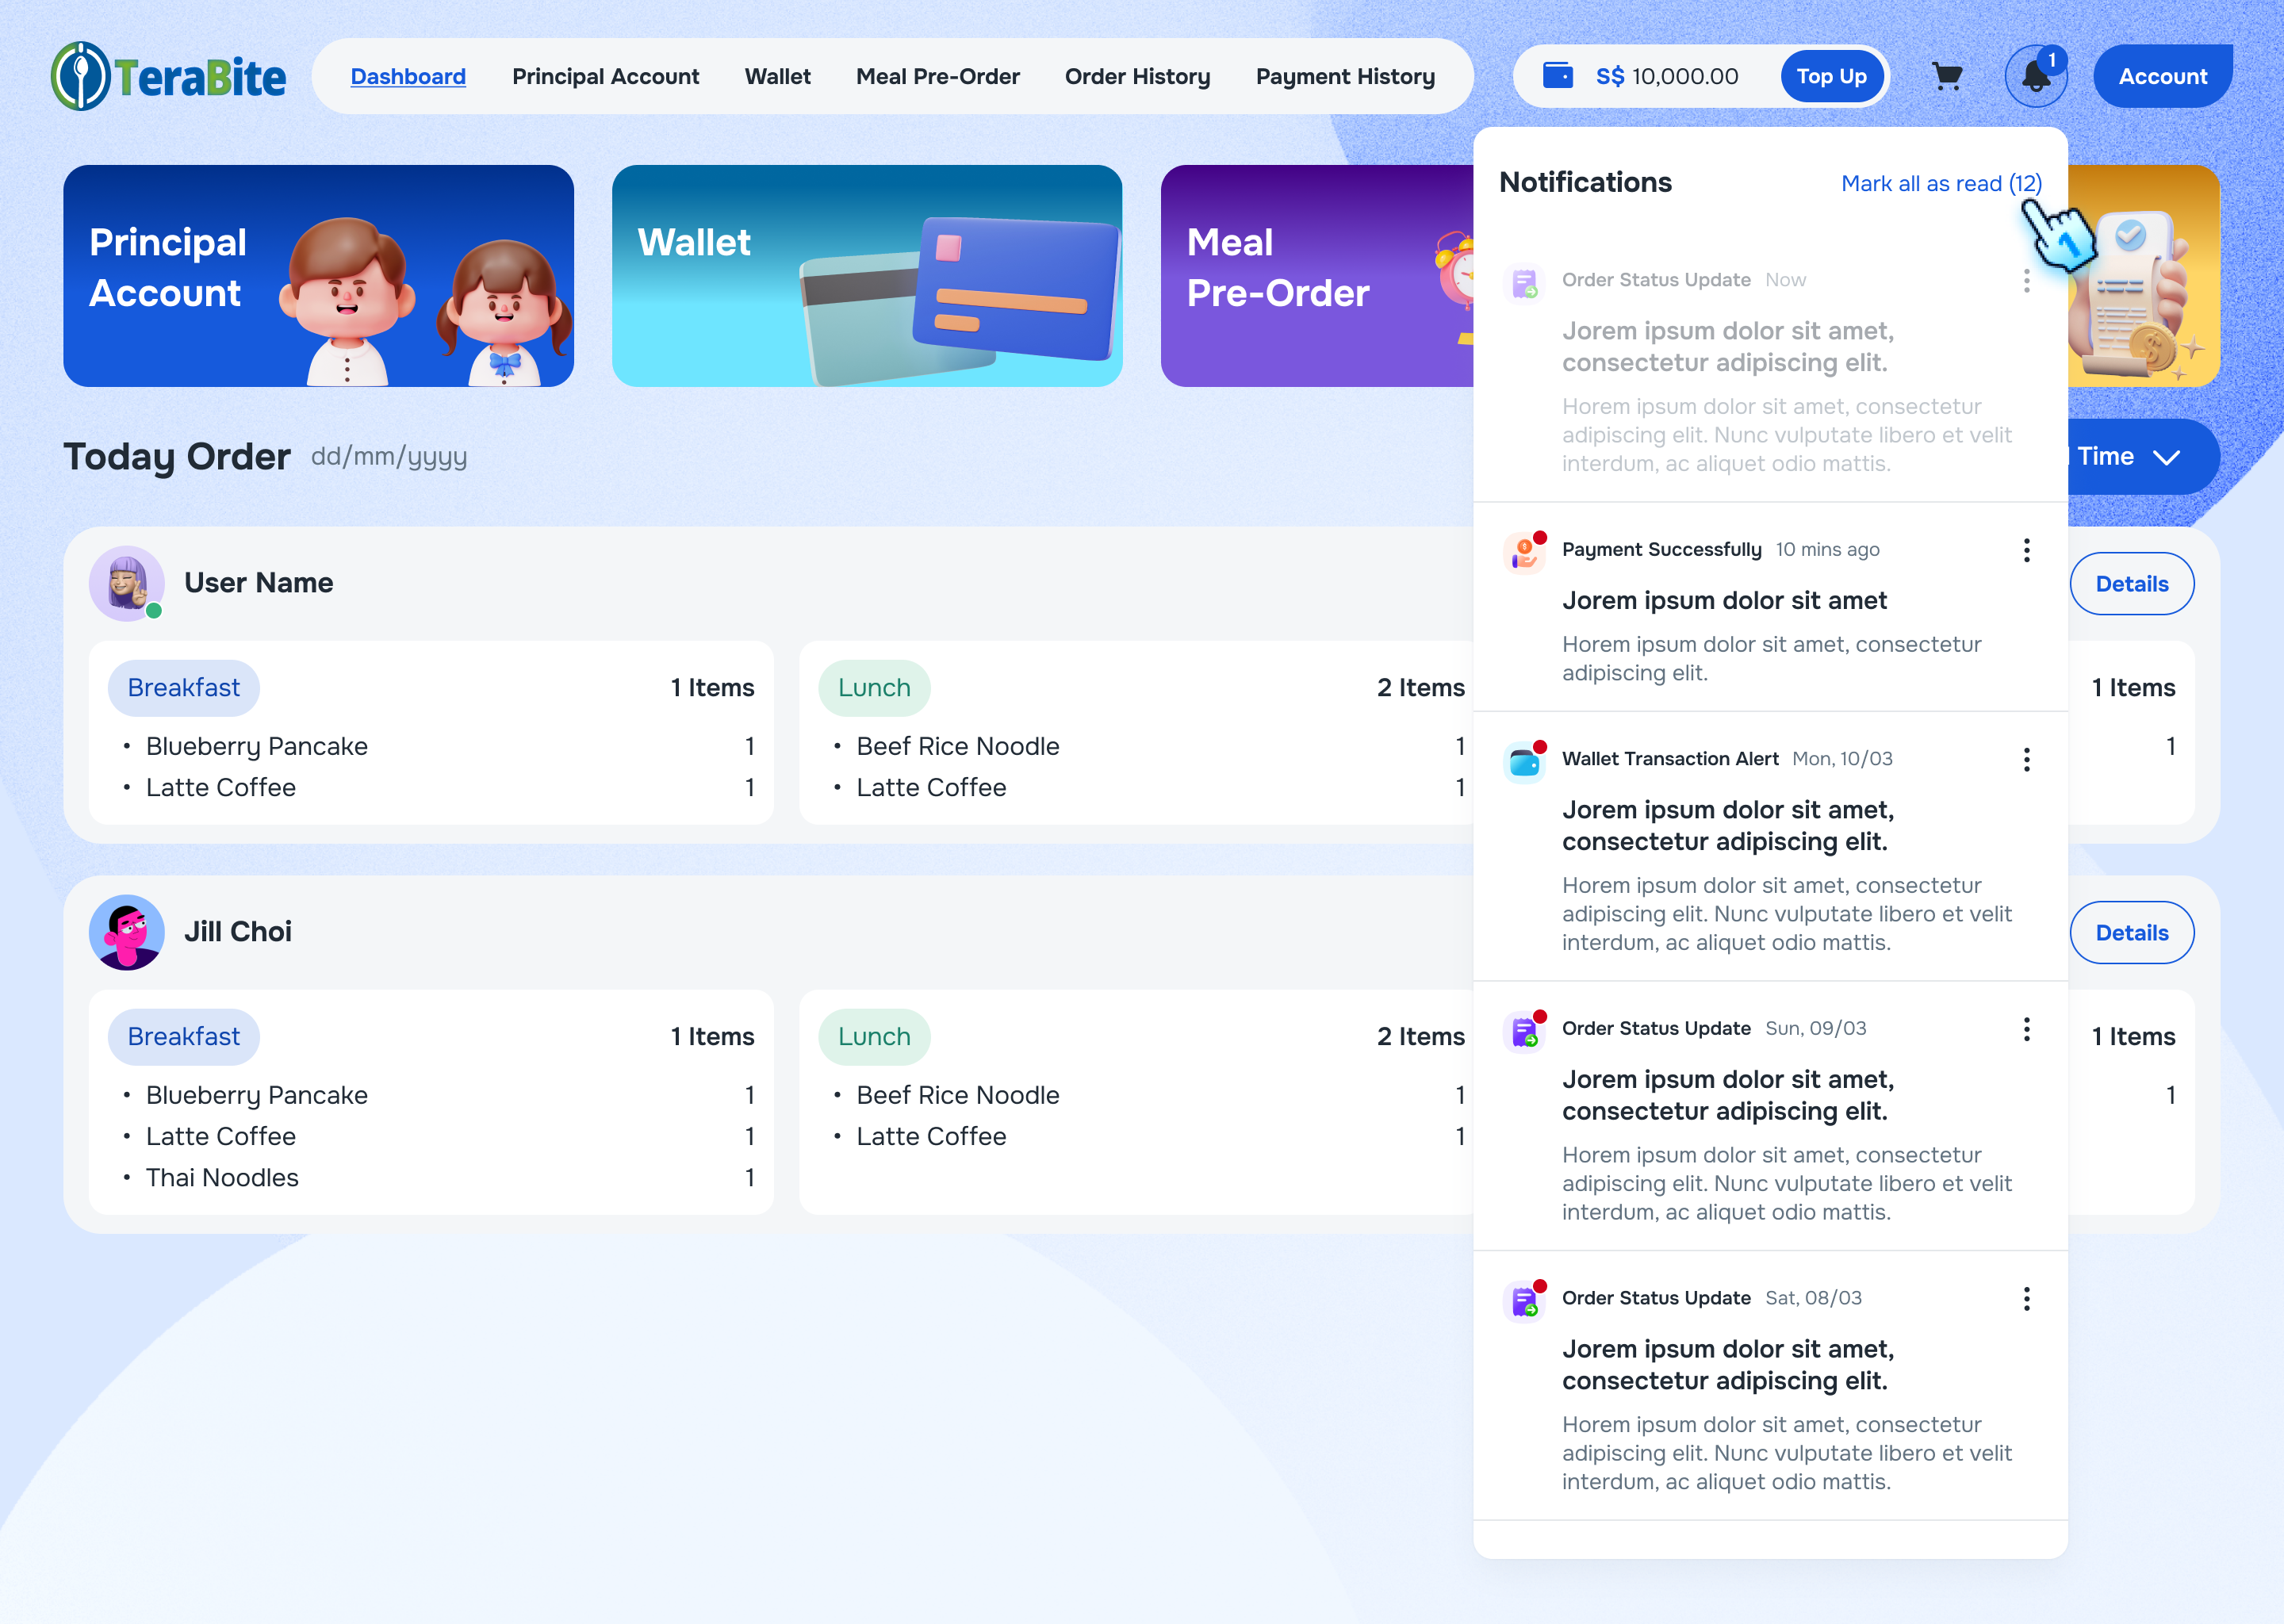
- Mark All as Read
- User has unread notifications and selects "Mark All as Read."
- All notifications are marked as read.
- Mark a Single Notification as Read
- User has unread notifications
- Tap on three dot menu at a single notification
- Select mark as read.
- The specific notification is marked as read.
- Delete a Notification
- Tap on three dot menu at a single notification
- Select Delete button
- The notification is removed from the list.
Conclusion
This document provides a structured approach for managing notifications within the Customer Portal, ensuring users can view, interact with, and organize their notifications effectively.